Tips for taking brighter photos
It’s been a little while since we last talked Photography.
Today, we’ll talk, once again, about taking bright photos- even when working with limited light sources. Looking at a lot of my own images, you might think that the space where I shoot is really bright and taking pictures is a breeze. Nothing could be further from the truth. I actually struggle at times quite a bit, because of how dark our home is. I don’t have big windows or bright roomy spaces, so I gotta work with what I’ve got.
Few things that helped me the most: knowing how to work with the natural light that’s available to me by bouncing and diffusing; recognizing the best times during the day to shoot and getting familiar with Photoshop.
LIGHT
Good lighting is the key and natural light is ALWAYS the way to go. Remember that light is the single most important thing in photography. Here’s what you need to do: find the brightest spot in your home- like a big window or even a door (with the door, you’d obviously open it to let the light in, unless it’s a glass door, like in my case). Time of day when you take your photos actually matters quite a bit too. After you find that bright spot, observe it during different hours of the day and get familiar with it. I personally get the best light in the morning and early afternoon. In late afternoon hours, the sunlight is a bit too harsh and bright and I have to deal with a lot of shadows.
If you have no choice but shoot during a time of the day when the sun is very harsh, you can easily diffuse it. To prevent those harsh shadows and contrast, tape a blank, white piece of paper on your window or place it between your subject and your light source. You can also use a light curtain. Here are the results of diffusing the light:
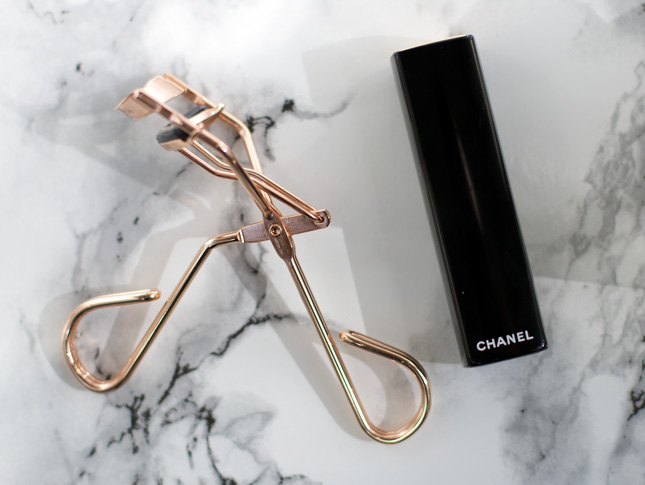
Before diffusing the light.
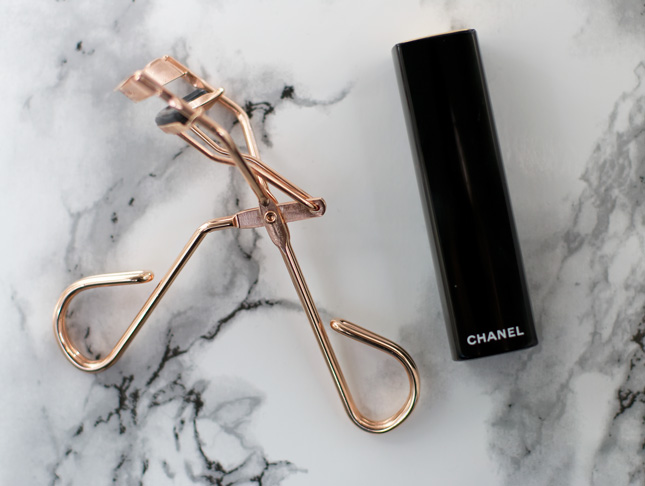
After diffusing the light.
Before you setup for your shoot, take a good look at your light source and study it. Where is it coming from? Is it soft? Is it harsh? If it isn’t bright enough, open the window or the door. If the sunlight isn’t too strong you can even go outside. Once you understand how to work with your light, taking brighter photos will become much easier.
REFLECT THE LIGHT
Once you understand how to best position your objects and work with your light, you might want to learn how to reflect it as well. This is especially important if you have light coming only from one source/side. This is exactly the case for me- the light comes in only from the right side (usually, depending on how I setup). This means that the light doesn’t “spread” evenly across my image- that’s when a reflector and a white cardboard usually save the day. This is what my usual setup looks like (keep in mind that yours might be different):
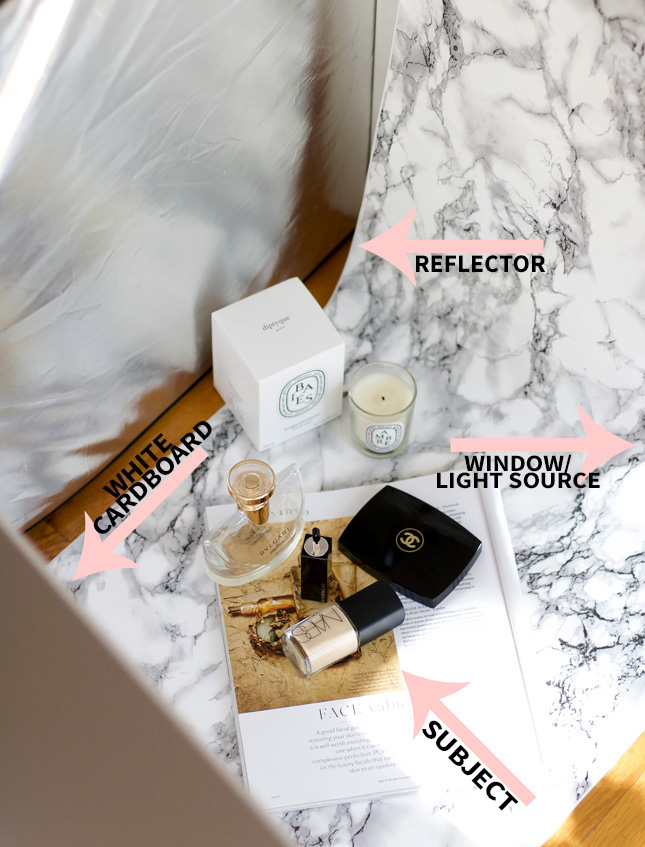
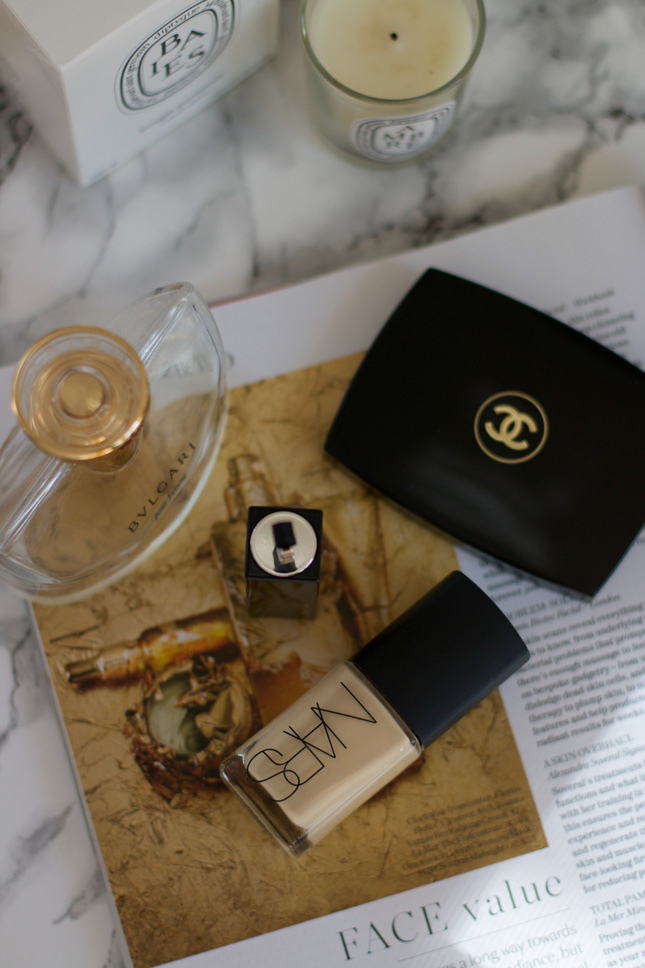
Here you can see that this alone makes a difference in the way this image looks. Both images are unedited and were shot with the same settings. ISO 160 f/2 Shutter speed 1/125:
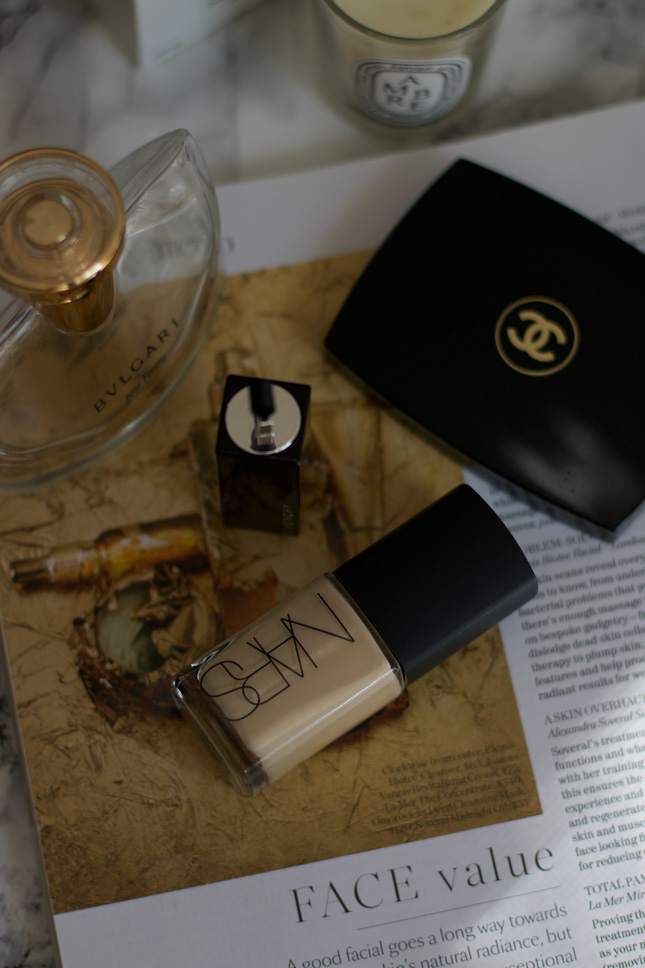
CAMERA SETTINGS
Your settings obviously play a big role here. I highly recommend that you get to know your camera and shoot manual (this post explains all manual settings in more detail). Your aperture controls the amount of light that travels through the lens into the film plane and it’s indicated by the f-number. The aspect of an f-stop can be a bit confusing, because as the f-stop decreases, the opening increases. For instance, an f-stop of f/1.8 will open the lens a lot wider than an f-stop of f/5.6. In other words, f/1.8 will let in a lot more light than f/5.6, the smaller the f-stop, the wider the opening, the brighter the image and the shallower depth of field.
Higher ISO settings will produce brighter images- but don’t go overboard as high ISO settings can create digital noise and turn your images grainy. Shutter speed controls the duration of exposure, meaning, it controls the speed at which the curtain (camera shutter) opens and closes. All this means is that it controls how long the light is permitted to enter your camera. Once you know how to work your triangle exposure (aperture, ISO and shutter speed) you’ll be able to tell your camera exactly how to behave as your light situation changes.
EDITING
Last, but certainly not least, is the part of editing your images. My images improved SO much when I started editing them in Photoshop. The great thing aboutPhotoshop these days is that you can get a monthly subscription for about 10 bucks a month. I was a little hesitant about the subscription at first, mainly because I believed Photoshop to be very difficult to use. It’s actually pretty straight-forward and while it can be a bit overwhelming at first, it’s totally worth getting familiar with.
There are so many helpful tutorials out there, and I personally love editing my images in Camera Raw. I’d also definitely recommend that you shoot in RAW format- that way you’ll have more control over your images. Here’s what my editing process looks like.
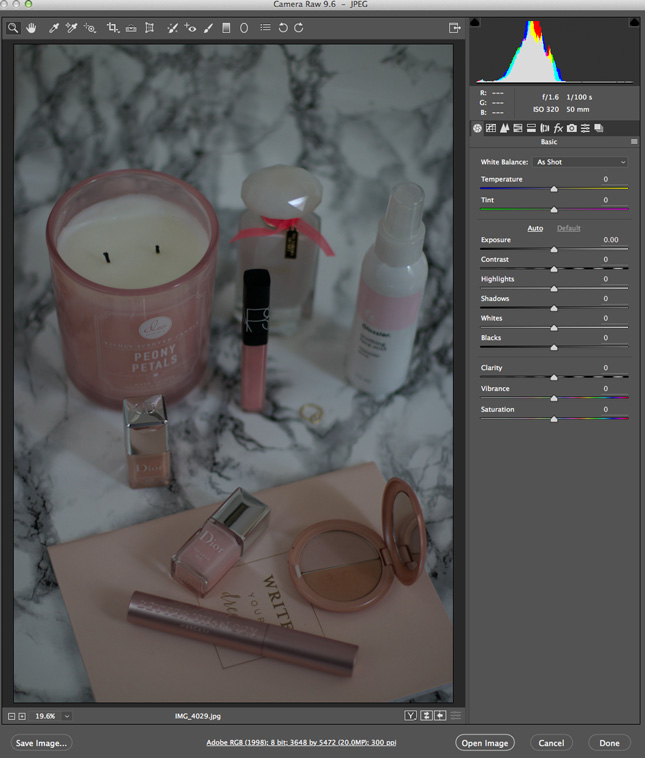
I open my image in Camera Raw in Photoshop. My images open in Camera Raw automatically, but you can open them in Photoshop and from there go Filter->Camera Raw Filter.
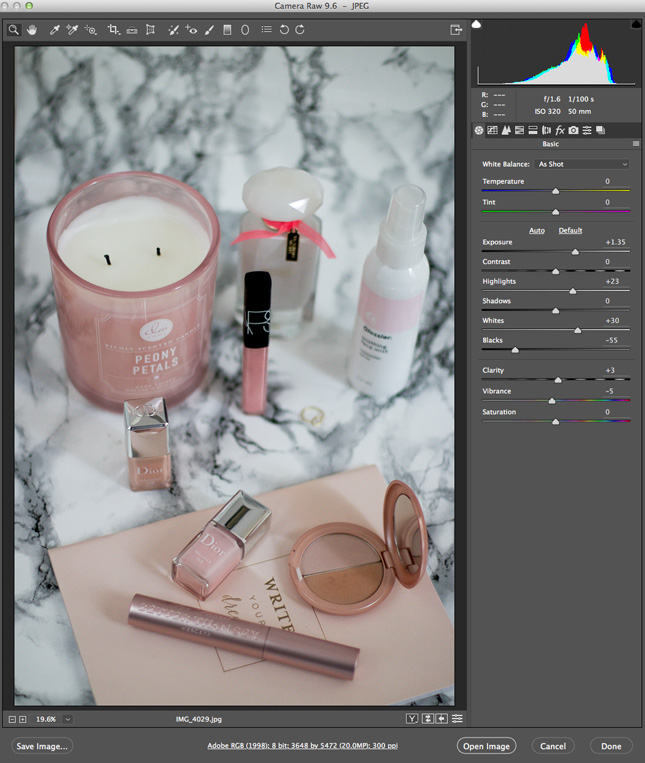
Here I adjust exposure, clarity, highlights, shadows, etc.
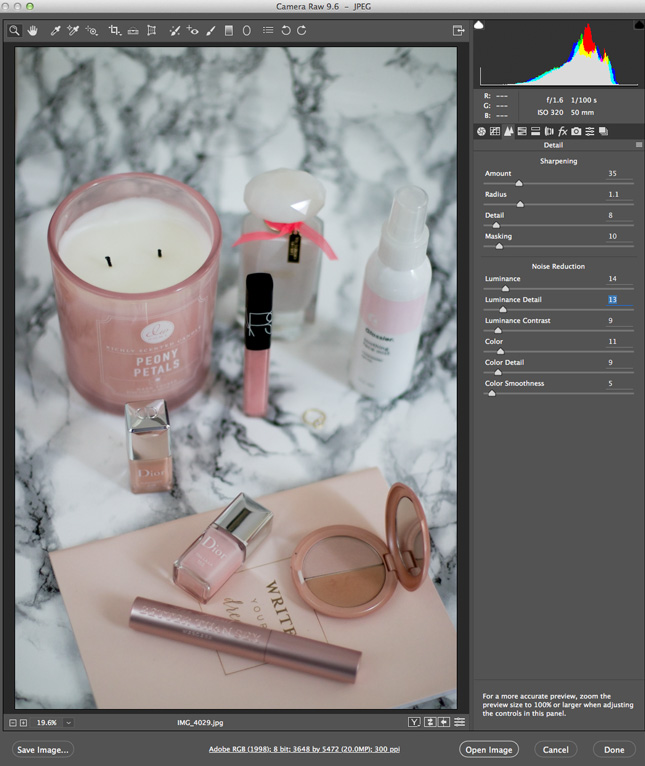
Sharpening and noise reduction.
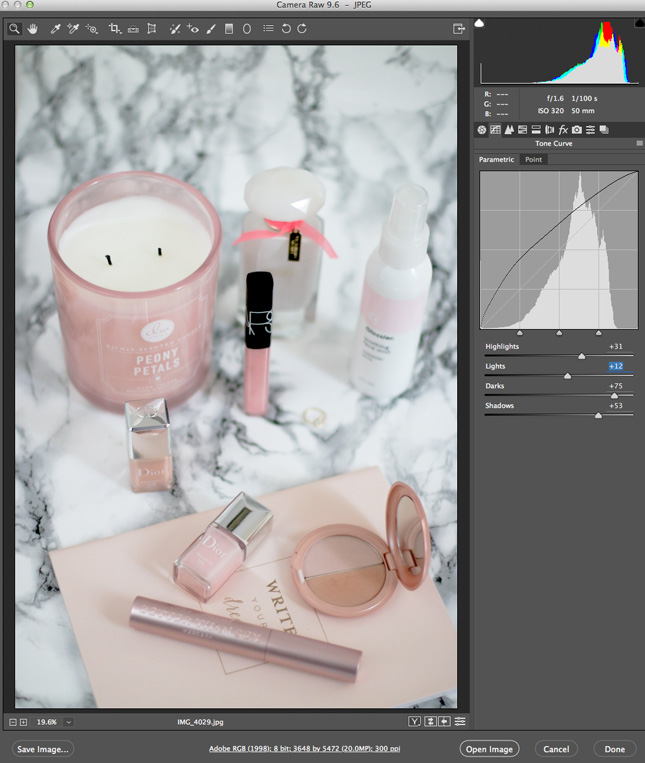
Adjusting Tone Curves.
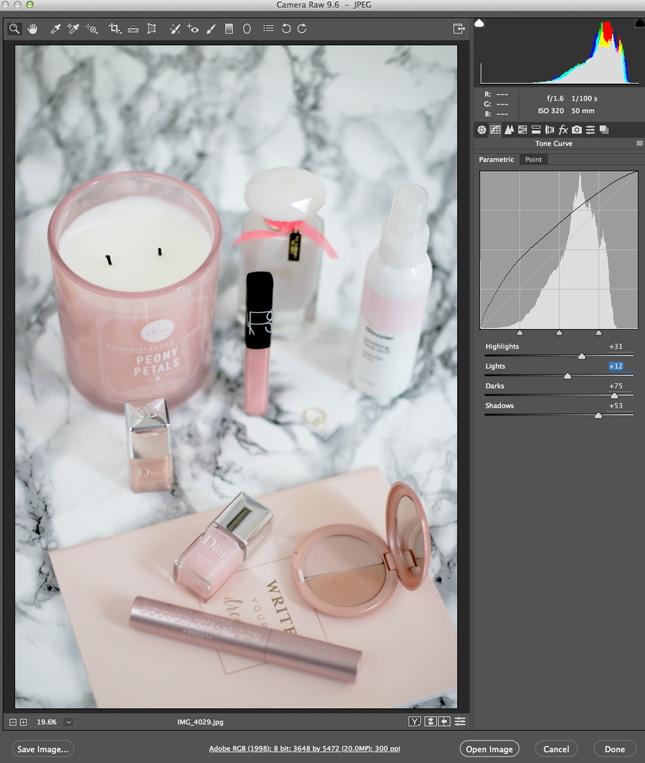
Final image. Before finishing up, I adjust my white balance (I always try to do this even when my settings were great) and lastly, I resize my images.
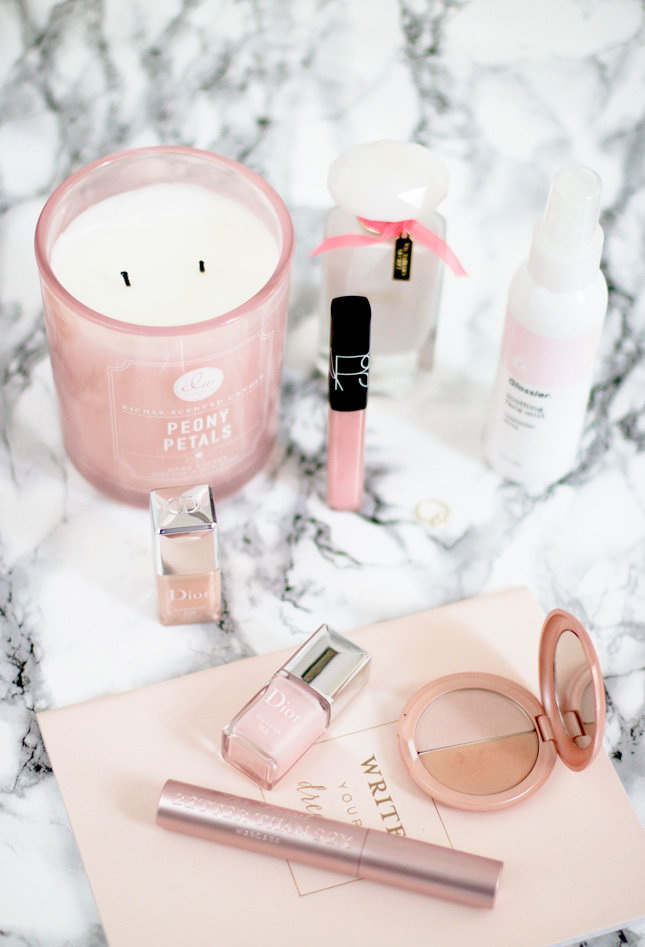
Final product.
When it comes to editing in Photoshop, you definitely have to play around a little with different settings and see what works best for you. There are hundreds of different ways of doing things, but I think that editing images in Camera Raw is one of the easiest ways of going about it.
The best thing you can do is learn how to work with your light. Look where the shadows fall, use a reflector to even out that light and a diffuser to minimize any shadows. If you’re working with a DSLR, get to know your camera! This will give you a huge advantage.

105 Comments
Brittany
September 12, 2016 at 8:53 pmWow! So many great tips in this post! There are so many things I know want to try. I’ve never thought about defusing or reflecting my the light in my house. I’ve been using photoshop to edit my photos since the beginning but have yet to switch to photographing in Raw. The funny thing is, I don’t know why! I’ve heard that is so much better for years! Thanks for sharing. I will definitely be trying some of these tips!
Brittany | thechicette.com
Paula @ lifestylegleam.com
September 13, 2016 at 12:59 pmThanks Brittany! RAW images take up a lot more room, but they give you so much more freedom when it comes to editing. I definitely noticed a huge difference. x
Gitana Deneff
September 12, 2016 at 8:53 pmOne thing I really want to work on is making my photos look better. I’m about to revamp my entire blog because some theme things aren’t working AT ALL and I’m so pissed about it but this gives me a chance to start out fresh. :)
Thanks for the tips!
XX
Gitana | Books & Bellinis | Instagram
Paula @ lifestylegleam.com
September 13, 2016 at 1:10 pmI feel like I’m constantly learning something new about photography, so my style and process also changes quite a bit. The beginning was definitely very frustrating haha ;)
Akanksha Swami
September 12, 2016 at 9:34 pmLove this! How did you get that background?!
Paula @ lifestylegleam.com
September 13, 2016 at 1:02 pmIt’s a marble contact sheet/adhesive: http://amzn.to/2c8qoH6 I also have a post about it right here: http://wp.me/p2ZnWj-4hB
Nicole Merza
September 12, 2016 at 9:42 pmThese are really helpful tips! Thank you for sharing :)
Nicole | The Glam Surge
Paula @ lifestylegleam.com
September 13, 2016 at 1:11 pmThanks Nicole!
Chelsea
September 12, 2016 at 10:42 pmSuch great tips! I just bought a new DSLR today and my goal is to start shooting in RAW and editing in Camera RAW, so I definitely appreciate this post!
Olive & Ivy
Paula @ lifestylegleam.com
September 13, 2016 at 1:11 pmYay! Congrats on your new camera, I’m sure you’ll have a lot of fun learning all about it! :)
Trecee Hutchinson
September 12, 2016 at 11:52 pmI love your tips! They are so helpful!
Trecee
http://treceefabulous.blogspot.com/
Paula @ lifestylegleam.com
September 13, 2016 at 1:11 pmThank you!
mika
September 13, 2016 at 1:14 amGreat tips Paula! :) I like how you edit your pics in photoshop. I do the same! I shoot in RAW and edit them all there. I only wish mine could come out as crisp as yours do, you don’t lose any quality when you edit yours! I feel like I need a clone of you to be with me here in Southern California to really understand fully what you do haha no matter what your pics are so amazing, and I appreciate these posts a lot! Every little bit helps! Thanks lovely!
xoxo
http://www.hellohimawari.com
Paula @ lifestylegleam.com
September 13, 2016 at 1:14 pmThanks so much Mika! I think you’re being way too harsh on yourself girly! Your photos are absolutely stunning- magazine worthy! I do kind of get it though, because I’m the same way sometimes haha. Even when working on this post I had to re-take my pictures and change my setup like 10 times because I didn’t like how they came out haha :) I’m really happy you like these posts Mika! <3
Lexie | NAILGIRL.NET
September 13, 2016 at 2:03 amSo helpful! Ever since I started shooting in RAW, I haven’t looked back. I really need a reflector…. One for the wishlist for sure!
Lexie
nailgirl.net
Paula @ lifestylegleam.com
September 13, 2016 at 1:14 pmMakes a big difference, doesn’t it?
Aleksandra // bunniesaremagic
September 13, 2016 at 3:15 amI wish there was one ‘make my photos great’ button somewhere… ;)
Paula @ lifestylegleam.com
September 13, 2016 at 1:14 pmYou and me both! :)
fromSandyxo
September 13, 2016 at 4:21 amWonderful tips as always. Sandyxo
Paula @ lifestylegleam.com
September 13, 2016 at 1:19 pmThank you Sandy!
Joanna
September 13, 2016 at 7:21 amThank you Paula for this post! I’ve actually started using manual settings after reading one of your previous posts and it did wonders for my photos. Achieving bright photos is one of my struggles, but the more pics I take the more I learn and improve. My flat is pretty sunny, but images taken inside always come out too dark; that’s why I started taking them on my balcony. But this obviously works only if the weather is nice. I’ll also use your tip with diffusing the light!
http://stylestandpoint.com
Paula @ lifestylegleam.com
September 13, 2016 at 1:23 pmYou’re very welcome Joanna! Yay, so happy that you tried some of my tips and that they worked for you- that makes me SO happy!
Ella Whitehead
September 13, 2016 at 7:45 amThank you so much for this post! I always find it hard to get my pictures brighter so this will be so handy!
Ella xx
http://www.inellaselement.co.uk
Paula @ lifestylegleam.com
September 13, 2016 at 1:23 pmYou’re welcome Ella!
Abigail Alice
September 13, 2016 at 9:30 amGreat advice! Reflecting the light is one I havent heard before.
Abigail Alice x
Paula @ lifestylegleam.com
September 13, 2016 at 1:27 pmThanks Abigail! It’s one that makes a big difference!
Christine C.
September 13, 2016 at 9:38 amAs always, fantastic advice! I always look forward to your photography posts! Also the styling in this photos above is gorgeous!
Paula @ lifestylegleam.com
September 13, 2016 at 1:34 pmThank you so much Christine!!! :) :)
Liz | Lipstick & Confetti
September 13, 2016 at 11:29 amThis is such a helpful guide!
xo, Liz
http://lipstickandconfetti.com
Paula @ lifestylegleam.com
September 13, 2016 at 1:34 pmThanks Liz!
Tanvi Mutneja
September 13, 2016 at 11:40 amLoved all the tips <3 After practicing i have come to a point where i know what time of the day suits best and i do use a reflector sometimes but not always i get to click great pictures.
http://www.theurbanista.net/summer-love-with-shein/
Paula @ lifestylegleam.com
September 13, 2016 at 1:35 pmThat’s when editing usually helps me! ;)
Polly
September 13, 2016 at 11:42 amThank you for this helpful post! I’m always trying to learn how to improve my photos!
Polly
http://gemsandjoy.com
Paula @ lifestylegleam.com
September 13, 2016 at 1:36 pmYou’re very welcome Polly!
The Gossip Darling
September 13, 2016 at 11:49 amSooooo helpful!!! I need photoshop and I need to learn how to use it!!!!
Mel | http://www.thegossipdarling.com
Paula @ lifestylegleam.com
September 13, 2016 at 1:38 pmPhotoshop is a life saver!
Federica
September 13, 2016 at 11:57 amThank you for sharing this tips, I definitely need Photoshop in my life! x
http://www.theprettypeony.com
Paula @ lifestylegleam.com
September 13, 2016 at 1:44 pmI’m sure you’d love it! It makes such a big difference.
Rebecca Fletcher
September 13, 2016 at 12:49 pmthese are some really useful tips. Thank you for sharing!
http://www.beautylifebecca.blogspot.co.uk
Paula @ lifestylegleam.com
September 13, 2016 at 1:44 pmThank you! ;)
Kiran
September 13, 2016 at 1:55 pmAmazing tips! Judging by the quality of your photos I thought you had a professional photography studio in your home! Your pics are always flawless, thank you for sharing! Xx
ALittleKiran | Bloglovin
Paula @ lifestylegleam.com
September 15, 2016 at 8:34 amHaha no way! It’s all about working with what you got ;) Thank you SO much Kiran!
molly
September 13, 2016 at 4:05 pmthese are some really great tips! i need to try some of them out as I’ve been feeling a bit unhappy with how my pictures have been coming out recently!
m0llylouise.com
Paula @ lifestylegleam.com
September 15, 2016 at 8:34 amThanks Molly! Practice makes everything easier! :)
Eloise
September 13, 2016 at 4:29 pmGreat post! I love a good photoshop curve xx
Paula @ lifestylegleam.com
September 15, 2016 at 8:34 amThank you!
Abril@The Color Palette
September 13, 2016 at 10:05 pmthank you for the tops, I definitely need to improve my pictures and this post came right on time.
x,Abril
The Color Palette
Paula @ lifestylegleam.com
September 15, 2016 at 8:34 amThanks Abril!
Jackie
September 13, 2016 at 10:34 pmThese are such incredible tips. I’m always looking to shoot better, brighter photos and wasn’t aware of some of these ideas. Definitely putting your tips into practice!
Jackie
Something About That
Paula @ lifestylegleam.com
September 15, 2016 at 8:35 amThanks Jackie, happy you liked this post! x
Face to Curls
September 13, 2016 at 10:52 pmSuch amazing helpful tips! Thanks for sharing!
Ann-Marie | http://facetocurls.com
Paula @ lifestylegleam.com
September 15, 2016 at 8:35 amYou’re very welcome, thanks for stopping by!
Tess_Sequins are the New Black
September 13, 2016 at 11:07 pmYou always have the best tips!! Using this for sure :)
xx Tess | Sequins are the New Black
Paula @ lifestylegleam.com
September 15, 2016 at 8:35 amAw thanks Tess!
Ambar Syed
September 14, 2016 at 4:09 amSuch great tips – I found this post really useful Paula, thank you :)
– Ambar x
http://www.herlittleloves.co.uk
Paula @ lifestylegleam.com
September 15, 2016 at 8:35 amSo happy to know that Ambar, thank you!
Claudia
September 14, 2016 at 5:39 amThis post is amazing! So useful, thank you xx
Paula @ lifestylegleam.com
September 15, 2016 at 8:35 amAw thank you so much Claudia!!
Maddy
September 14, 2016 at 12:59 pmGreat tips, your photos are always beautiful so they definitely work!!
Maddy, xo
Paula @ lifestylegleam.com
September 15, 2016 at 8:36 amThanks Maddy!
Kiersten Chalhoub
September 14, 2016 at 1:44 pmThis are wonderful tips! I’m going to try to find white cardboard for the reflecting tip!
Kiersten
Paula @ lifestylegleam.com
September 15, 2016 at 8:37 amThanks Kiersten! Arts and crafts stores usually sell a bunch of these with different sizes.
Katie S.
September 14, 2016 at 1:56 pmYour first post about bright photos was SO helpful and this is even more so! I might have to jump into editing in Photoshop… I’ve just been using an app on my phone since it’s so much faster but it’s amazing what you start with and where you end up. I was shooting in RAW for a while but holy cow are those files GIANT! Maybe I’ll go back and give that a try. Thank you for the great tips!
Paula @ lifestylegleam.com
September 15, 2016 at 8:37 amOh yes the RAW images take up a ton of space, that’s the only downside. haha :) Thanks so much Katie, so happy you enjoyed this post!!
Yvonne Ashon
September 14, 2016 at 2:08 pmThe angels answered my prayers with this post lol. Thank you so much.
http://www.yvesofstyle.com
Paula @ lifestylegleam.com
September 15, 2016 at 8:37 amHahaha aww thank you Yvonne! ;)
Ariadna Morell
September 15, 2016 at 8:20 amThat was such a helpful post, specially the Photoshop bit! x
Ariadna || RAWR BOWS
Paula @ lifestylegleam.com
September 15, 2016 at 8:39 amThanks Ariadna! Yes, Photoshop makes all the difference for me, especially when I don’t have a lot of light to work with. ;)
Loredana Manciu
September 15, 2016 at 8:54 amI have Photoshop for a while but i did not have time to play with it….and i am sorry because i have a mirrrless camera for my blog and also i don’t use it at maximum capacity….
Paula @ lifestylegleam.com
September 18, 2016 at 8:53 amDefinitely try to take advantage of it if you already have it!
Josie Brownlee
September 15, 2016 at 6:35 pmSome great tips about the white cardboard and reflector – didn’t realise they made such a difference! Photoshop is my saviour for brightening my photos – but helpful to learn about the camera settings too, definitely something I need to practice using.
Josie
JosieVictoriaa // Fashion, Travel, Lifestyle
Paula @ lifestylegleam.com
September 18, 2016 at 8:54 amThanks Josie, I can’t live without my reflector :)
Lisa Villaume
September 16, 2016 at 6:22 amThis is going to help me so much with my blog photos, especially about the Photoshop adjustments. Its just so dark and gloomy in London all the time. Thanks for a great a post – as usual x
Lisa Villaume | Where Women Dream Big + Master Their Lives
Paula @ lifestylegleam.com
September 18, 2016 at 8:54 amYou’re very welcome Lisa!
Cristy Preisser
September 17, 2016 at 2:09 pmSuper good tips, def going to try them out.
xoxo
cristyproca.wordpress.com
Paula @ lifestylegleam.com
September 18, 2016 at 8:54 amThanks Cristy!
Jennifer Frank
September 18, 2016 at 7:51 amThanks for the great helpful tips!
Jen | Giveaway | Velvet Spring
Paula @ lifestylegleam.com
September 18, 2016 at 8:55 amYou’re welcome!
Emma Louise
September 18, 2016 at 8:08 amThis was really helpful. I always use natural lighting as it works so much better. I do need to get a reflector!
EmmysBeautyCave | Bloglovin | Blog Header Services
Paula @ lifestylegleam.com
September 18, 2016 at 8:55 amNatural light is definitely a way to go.
Jayd Alice
September 18, 2016 at 8:41 amThankyou so much for sharing this, it’s got me so inspired! x
http://www.alwaysalice.co.uk
Paula @ lifestylegleam.com
September 18, 2016 at 8:56 amAw so happy to hear that!
Alyse (J.X.L.)
September 18, 2016 at 4:12 pmI enjoyed the thorough example where we’re actually taken through your entire editing process. It’s amazing that such a bright, light photograph came from the RAW file!
Alyse (J.X.L.) | Lumière & Lens
Paula @ lifestylegleam.com
September 24, 2016 at 1:42 amThanks Alyse!
jodie.keith
September 18, 2016 at 5:07 pmI definitely need to get my hands on photoshop and learn how to edit my photos better! I’m slowly getting there with my photography – photos of your standard are the ultimate goal, though!
Jodie @ Jodetopia x
Paula @ lifestylegleam.com
September 24, 2016 at 1:42 amAw thanks Jodie! Photoshop is amazing. x
Simply Nancy
September 18, 2016 at 8:08 pmI love using camera raw as well! Photoshop does look a bit scary until you learn to use it. I’m going to start adjusting my tone curves! Thank you for this post <3
http://www.simplynancyblog.com
Paula @ lifestylegleam.com
September 24, 2016 at 1:42 amIt was a bit intimidating at first, definitely. So glad I decided to try it though!
Heidi
September 18, 2016 at 8:55 pmThis is a really helpful post and I absolutely love that your photos always have a dimensional aspect, it’s a nice twist on flat lays.
http://www.alittlewhimsical.com
Paula @ lifestylegleam.com
September 24, 2016 at 1:43 amThank you so much Hedi! x
Brooke
September 20, 2016 at 9:04 pmGreat post! These are all such great tips. Just what I needed as I am brand new to the photography world. :)
Brooke | http://www.beautydecorandmore.com
Paula @ lifestylegleam.com
September 24, 2016 at 1:43 amAw yay, so happy you liked this post Brooke! x
Erin
October 24, 2016 at 12:12 amLove this post as I just bought a new DSLR!
xo Erin
Paula @ lifestylegleam.com
December 20, 2016 at 9:22 amYay! that’s awesome :)
Mymakeupdesk
December 20, 2016 at 9:16 amWhat do you resize your images to Paula? I always struggle with this. I normally just save as JPEG and be done but I’m noticing it’s effecting quality.
Paula @ lifestylegleam.com
December 20, 2016 at 9:21 amI save them for web in Photoshop and set the quality for “High”. I talked about it in this post: https://www.thirteenthoughts.com/blog-tips-how-to-optimize-your-images-improve-seo/
Mymakeupdesk
December 20, 2016 at 9:33 amThank you so much for replying, I was going through all your blog posts I must have missed it xx
Paula @ lifestylegleam.com
December 20, 2016 at 9:40 amYou’re welcome! x
Mymakeupdesk
December 20, 2016 at 9:50 amWould you suggest saving the same way for Instagram posts?? Xx
Paula @ lifestylegleam.com
December 20, 2016 at 10:18 amYes, that’s what I do for my IG pictures as well.
Catherine.mw
January 2, 2017 at 8:15 amAmazing post!! I’d never thought to diffuse the light by taping a piece of paper on the window before, getting the right natural light can be a nightmare! Some days it’s too dull and miserable to get a nice shot and other days the sun is too glaring bright! Will definitely try some of your tips, thanks! xo
Love, Catherine
Maria R
January 14, 2017 at 7:45 pmIt was so useful! Great pictures make a difference and in my case the lightning is the biggest problem. I don’t have a professional camera either, but I may start saving up for it :)
https://mariarttr.blogspot.com.ee/
Canyon Sherida Holgate
February 7, 2017 at 9:58 pmThank you for sharing these tips on how to lighten your images. I’m just getting started taking better photos with my DSLR & I think these tips will help me a lot.
http://www.canyonheart.com
Jackie
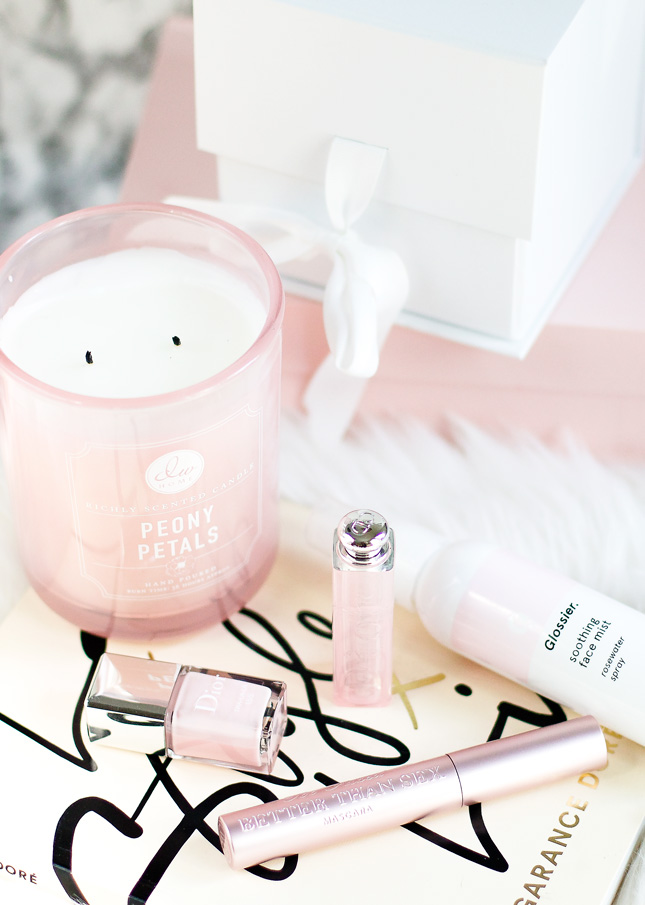
February 16, 2017 at 5:24 pmI think you have some of he best photos in the biz! But I just had to share- I have that same Peony Petals candle. Bought it because I thought it would be great for photos, but now I’ve melted half of it away because it smells so good!!!
Lilian
March 31, 2022 at 2:59 pmCongratulations, I think this was one of the most complete articles I’ve read on how to take pictures.
Thank you for sharing