Let’s be real- first impressions are everything. This includes your blog.
Your photos are often what gets you noticed, and it’s what gets people to click on your posts, share them and like them.
A huge portion of blog-related questions I get from you guys have to do with photography. The type of camera I use, lens, equipment, how I edit my photos, how I get them to look bright and sharp.
I also know that photography is one of the categories I’ve been neglecting a bit, recently. Since I’ve been getting a lot of requests for more photography-related content, I thought that today I’d talk about some of my favorite photography tools.
BEST PHOTOGRAPHY TOOLS + EQUIPMENT FOR BLOGGERS
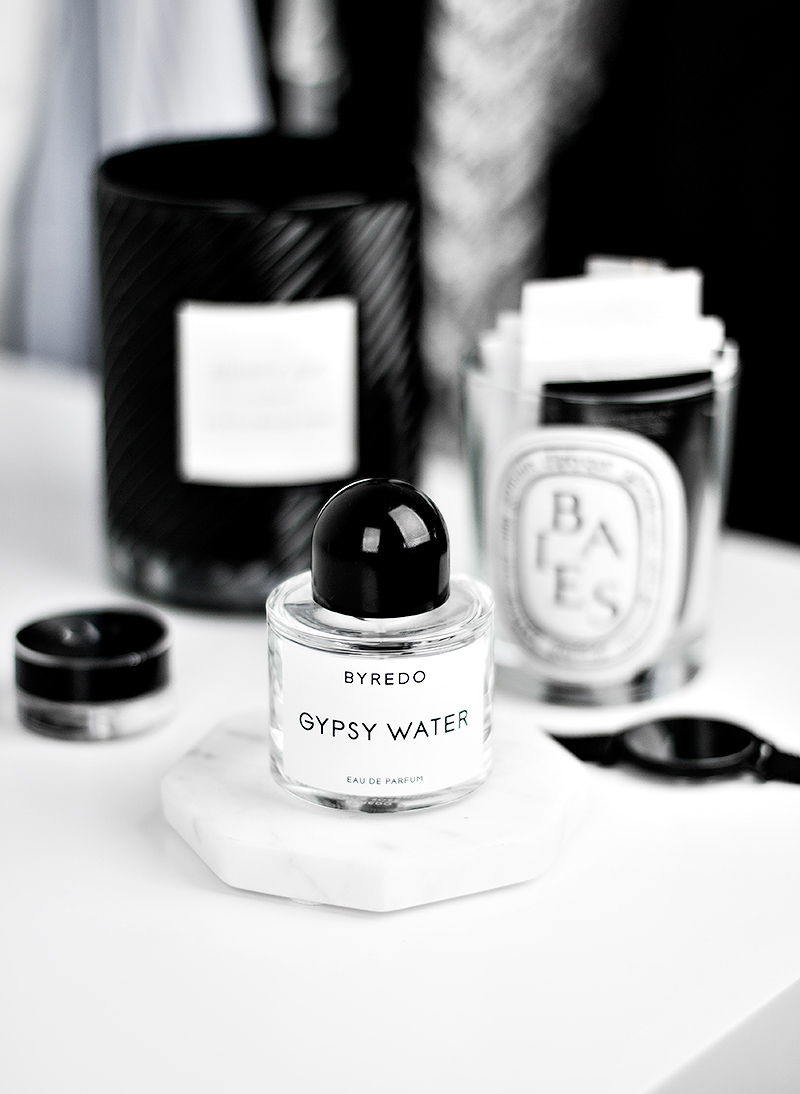
Shot using a 50 mm lens: 1/500 sec; f/1.4; ISO 100
MY FAVORITE LENSES
Two questions I hear most often are: “how do you get your photos to look so bright?” and “how can I get that nice, blurry background?” One of my favorite lenses is a 50mm f/1.4 lens (you can also get a f/1.8 version, often called a “nifty-fifty” which is very lightweight and super affordable- it was my go-to lens for many, many years). If your budget allows it and you work with low light conditions, I highly recommend the 50mm f/1.4 lens (the nifty-fifty is great too, though). This lens is really great for low-light photography. With such a wide aperture of f/1.4, this lens lets in a lot of light and allows you to use higher shutter speed, in order to get sharper photos. The wide aperture is also what will help you get that beautiful, shallow depth of field or “blurry background.”
Another lens that I use all the time is a 40mm f/2.8 lens, also called a “pancake” lens. It’s very compact and light so it’s great for traveling or carrying around. This lens also takes bright photos, produces high-quality, sharp images.
TRIPOD + SHUTTER RELEASE
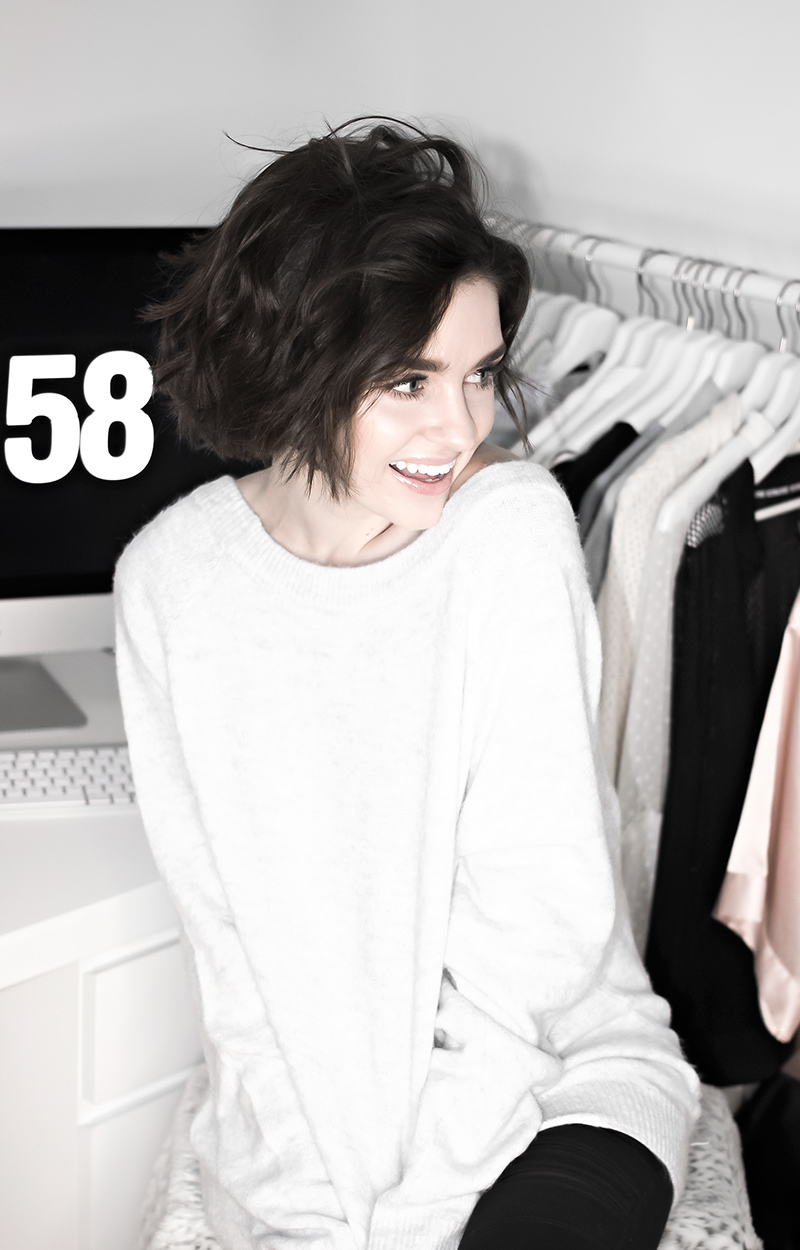
You can’t tell from the photo above, but I actually used my foot to take this photo, using a shutter release. I mean, sometimes you just gotta do what you gotta do. While I do occasionally get help from Mark (especially since my back injury), most of the time I do all of my photography by myself. This means that I sometimes wish I had an extra set of hands. This is why a good, steady tripod and a shutter release are so important- they do make you feel like you’ve got an extra set of hands. And, if you do most of your blog-related photography all by yourself like I do, you can also use both the tripod and a shutter release to take your own headshots (I have another photography post coming up, with some tips for taking your own headshots/photos, too). I previously used a bunch of wireless remotes, but for some reason, they all stop working after a while, which is why I prefer a shutter release (I just use it with an extension cable like this one).
A tripod is also something that will help you keep your camera very steady and avoid handshake when working with low shutter speeds, or when taking photos of things like swatches, etc. I definitely recommend investing in a good quality tripod, one that doesn’t wobble and can hold your camera and one that makes it easy to move the camera in different positions. I have one that’s similar to this one– I’ve had it for over 5 years now, use it pretty much daily and it works as great as it did when it was brand-new. It’s pretty large/tall, too, which I love as it means that I can take my shots from high above- this is important when working with fixed lenses like a 50mm or a 40mm since they do not zoom in and out.
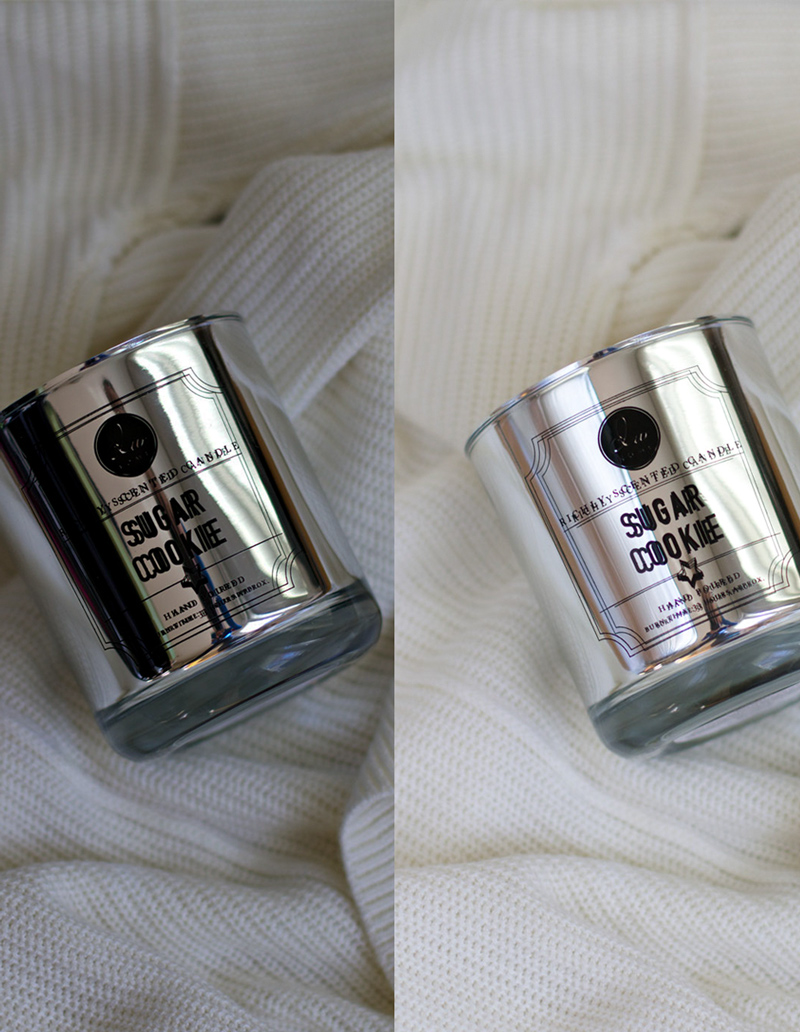
Before and after using a reflector (with no editing!)
REFLECTOR
I use a reflector every single time I take my photos. Our home isn’t as bright as I’d like it to be and I usually shoot next to a big sliding door that leads to the yard. This means that my light source is only coming from one side. I use this reflector to bounce off the light and brighten up my photos- my photos would not look the same if it wasn’t for the reflector. It also helps to get rid of shadows, it’s a 5-in-1 so you can also use it to diffuse or block light, as well.
You guys often ask me “what’s the best place to put my reflector when I take my flatlays?” and this really depends on your setup, the direction from which your light source is coming and your environment. I usually use the silver side of my reflector and move it around to see which position will help me brighten up the image most. The white side is great for when taking portraits/headshots too, as it brightens the face and helps to add that nice sparkle to the eyes.
PHOTOSHOP
Photoshop is my favorite tool for editing images. It’s a bit intimidating at first, yes, but it can make a HUGE difference in the way your photos look. It’s also a lot more affordable these days- I pay around ten bucks a month for my subscription and you can always get a free trial, first.
Here’s a little before and after to give you an idea of how Photoshop changed the game for me. A lot of people tend to think that images should look perfect the moment you upload them from your camera to your computer. Not true. Before I upload my shots to my computer, they look nothing like they do once I’m ready to upload them on my blog.
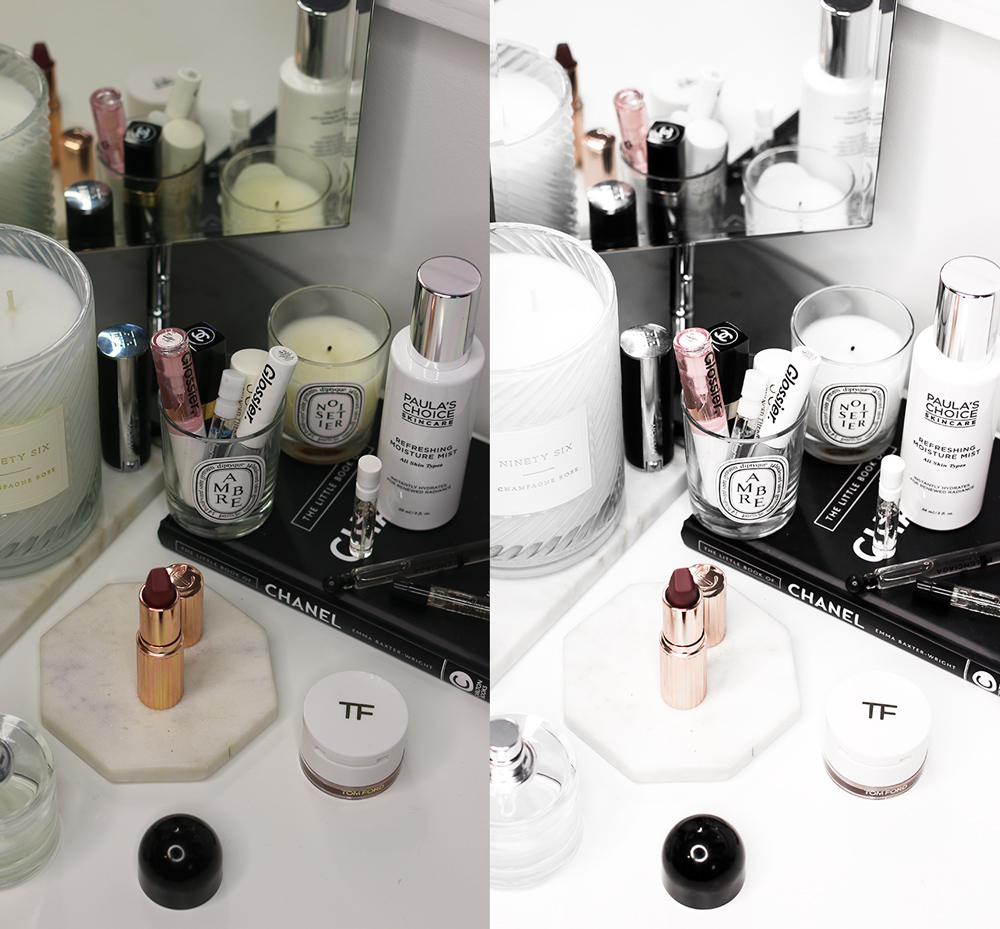
Before and after editing in Photoshop
Usually, when working with natural light, I tend to do a little editing of my images. With the image above, I actually took it in the middle of the night, using my softboxes and a ring light. If you don’t always have time to take your photos during the day, or if the weather is refusing to cooperate, softboxes are a great investment. I bought mine about 4 years ago and they still work as good as they did when I first got them. I already talked about a few Photoshop tools I like to use in this post, so feel free to check it out. The main thing I do when editing images taken under artificial light, is to remove blue and yellow undertones.
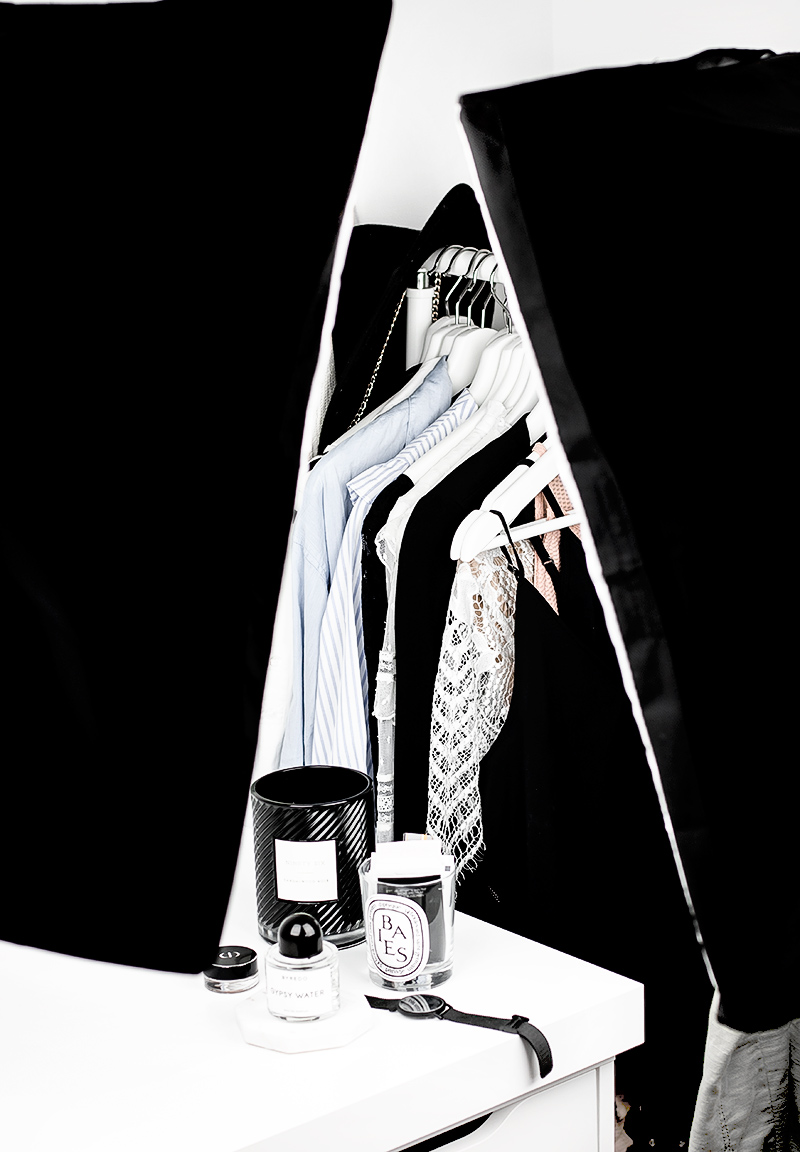
This is what my setup usually looks like when using softboxes.
When working with a lens like a 50mm, you often have to tweak the manual settings a bit and if you don’t want the shot to have a single-focus, but rather, have your entire image look sharp and in-focus, you have to change your aperture, shutter speed, and ISO. This, in turn, can make your photos look darker (the smaller the f/ number, the bigger the aperture, the brighter the image). As you raise your shutter speed, your image becomes sharper (very important if you like to hand-hold your camera to compensate for any movement), but it also becomes darker, raising your ISO can also sometimes make your images look grainy. This is why sometimes, my images tend to look very dark before editing- because I want them to be sharp.
For quick edits, I love to work in Camera Raw in Photoshop. I usually remove blue and yellow tones when working with artificial light, which is what helps me go for that monochrome look I love so much. Of course, I try to avoid messing with tones when I take photos of things like product swatches and always try to take those in natural light.
Canva and PicMonkey (get a free trial here) are also nice alternatives to Photoshop.
Okay, now for the most important part- the camera. I use and love a Canon 70D, which is also great for filming videos. I previously used a Canon 60D, which is a great camera too. I don’t think that you need a very expensive piece of equipment to get great photos though. If you are using a DSLR, I definitely recommend getting your hands on a 50mm f/1.4 or a 50mm f/1.8 lens (this one, again, is very affordable). With these lenses, there really is very little work you have to do. A 50mm lens is a great place to start if you’re a beginner. It’s also great for taking portrait photos.
If you’re a beginner, I also highly recommend you check out my Photography Tips for Bloggers post, especially if you’re thinking of getting a DSLR, recently bought one, or just want to understand how to work with manual settings and get your photos to look the way you want them to look.
This content includes referral links. Read my disclosure policy for more info.


28 Comments
Nikoleta
October 4, 2017 at 10:44 pmSuch a helpful blog post! Thank you so much for sharing this!!! I will definitely buy the 50mm lens I need it!!
Nikoleta Lj, xoxo! / https://nikoletalj.blogspot.com
BlushandPearls
October 5, 2017 at 12:20 amThis was so helpful! I was considering getting a few items for photography from Amazon so this really helped narrow down what I need and what will actually work.
Blush & Pearls by Angela
Paula @ lifestylegleam.com
October 12, 2017 at 12:28 pmSo happy to hear that, Angela, thank you!
Lisa Autumn
October 5, 2017 at 3:04 amI am only using my iPhone tilbury now and really thinking about investing into a camera.. let’s see
xx Lisa | lisaautumn.com
Paula @ lifestylegleam.com
October 12, 2017 at 12:30 pmYou can definitely get great shots using your phone these days :)
Rosie von Waldherr
October 5, 2017 at 3:42 amWow, you really went into detail with this post! I am in desperate need of a new lense…but I need one that will make the background blurry in outfit shots and works well with product photographs…I’ll ask my boyfriend to check the ones you talked about here – he’s good with cameras ;)
LG, Rosie //Curvy Life stories
Paula @ lifestylegleam.com
October 12, 2017 at 12:33 pmA 50mm would definitely work great for that. Thank you so much, Rosie!
charlotte carter
October 5, 2017 at 5:55 amWhat an amazing and useful post!! I really need to get more useful photography tools for my blog! And need to work on editing them better!!
a life of a charlotte
x
Paula @ lifestylegleam.com
October 12, 2017 at 12:38 pmThank you, Charlotte!
Wag Doll
October 5, 2017 at 5:59 amThank you. I shoot with my iphone and also my ancient Canon 350D with a 50mm prime lens. Even though my camera is 14 years old it still get s amazing shots because of the great lens! I really want to get a tripod and reflector now Ive read your post :-) xx
Paula @ lifestylegleam.com
October 12, 2017 at 12:39 pmYes! The lens is often what makes the biggest difference! I’m sure you’d love a reflector- it makes such a big difference!
Linda Libra Loca
October 5, 2017 at 7:45 amI have a micro lens for my closeups and use the 50 mm for everything else. And I do use studio lights as most of my blog work is done at night when the kids are asleep. Still my pictures look nowhere as professional as yours, but I don't enjoy photography that much, so it will aways take the back seat for me.
Linda, Libra, Loca: Beauty, Baby and Backpacking
Paula @ lifestylegleam.com
October 12, 2017 at 12:40 pmDefinitely understandable. I’m super passionate about it and could talk about it for days haha ;)
Elisabeth Hayes
October 5, 2017 at 9:49 amThere is so much great advice in this post! I just got a reflector and can’t wait to test it out!
xo, Elisabeth
http://elisabethhayes.com
Paula @ lifestylegleam.com
October 12, 2017 at 12:40 pmThank you, Elisabeth! Hope you love your reflector, I can’t live without mine!
Aleksandra // bunniesaremagic
October 6, 2017 at 3:30 amI am so looking forward to not struggling with light – today we are moving to a place with ACTUAL TERRACE, can you believe it?! After all these years of living in a ground floor cave I can hardly imagine what it is like not to turn lights on at 1pm…
Paula @ lifestylegleam.com
October 12, 2017 at 12:41 pmOh congrats on your move!! It’s crazy how a well-lit home can make a difference. I seriously sometimes feel like exchanging all the windows in mine haha
Carolina
October 6, 2017 at 6:18 amNice tips! Thank you so much xx
Carolina’s Makeup Life
Paula @ lifestylegleam.com
October 12, 2017 at 12:41 pmThank you!
Natalie Redman
October 6, 2017 at 8:50 amI need to get myself some soft boxes!
http://www.upyourvlog.com
Paula @ lifestylegleam.com
October 12, 2017 at 12:41 pmI use mine all the time, they definitely come in handy!
Janah Jay
October 13, 2017 at 10:01 amThat photo of you in the white jumper is gorgeous! Can’t believe you took that yourself with your foot! lol :)
Paula @ lifestylegleam.com
October 17, 2017 at 10:51 amHaha! Thank you so much, Janah!! <3
Samantha Nicole
November 5, 2017 at 7:49 pmThese are such pretty photos! I’ve made a list of things I need to grab thanks to this post!
-Sam
lattes-andlonglines.com
Asaake | asakemi.com
November 24, 2017 at 4:44 amHad to come back here to get link for a new tripod stand. I’ve been reading so much about tripods and I’m so confused. I generally prefer to “buy once and buy right” so I end up over analyzing everything and confusing myself. This came in super handy for great place to start with tripods for me.
Thank you, Paula!
Clipping Creations India
January 27, 2018 at 5:36 amGreat useful post indeed. Being a newbie photographer this blog post helped me a lot, thanks for sharing with us.
Fourseasonslasercenter
July 31, 2020 at 8:54 amTruly wonderful, interesting and amazing post! Thank you for being thoughtful about sharing these insightful and helpful tips and advice on how to have the best photography tools and equipment for blogging!
Queens Photography
July 6, 2021 at 12:41 pmWonderful recommendations. My room’s window is north facing so I do not get a ton of light so the 50mm f/1.4 lens seems the way to go. thanks for the detailed blog.