
Get all the details for a DIY stair runner project with cost efficient, easy to clean stair runner rugs! Use an indoor outdoor runner for a look you’re going to love.
Find sources for modern stair runners and get a complete tutorial for how to accomplish this DIY in your own home – it’s easier than you might think!
As it turns out, the inexpensive solution for making over your old staircase may fit in your budget and your design dreams, too! You’ll find pretty and practical ideas in this diy staircase makeover tutorial.
Budget… yes, I said it. I don’t like that word, but sometimes, you just have to make compromises when you’re renovating your home, or at least what you would think will be a compromise.
I’ve brought you some posts about rug shopping in an effort to give you excellent resources to turn to when you are researching and shopping for flooring in your home.
It can be complicated, right? Finding the right size, affordability, durability and so much more…but don’t stress!
I’ve done the legwork for you and now you’ll have a world of info at your fingertips! This is an easy tutorial for a diy staircase makeover using a fresh, modern stair runner. We’ve done this project three times, actually – which means we’re almost experts.
If you’d like, you can also head right to the sources for our runners towards the end of this guide, or check out the easy step by step tutorial.
Staircase Before and After
When we first moved into our St. Louis home (see the full before and after here) we wanted to freshen up the basement right away so we had a space for our girls to play.
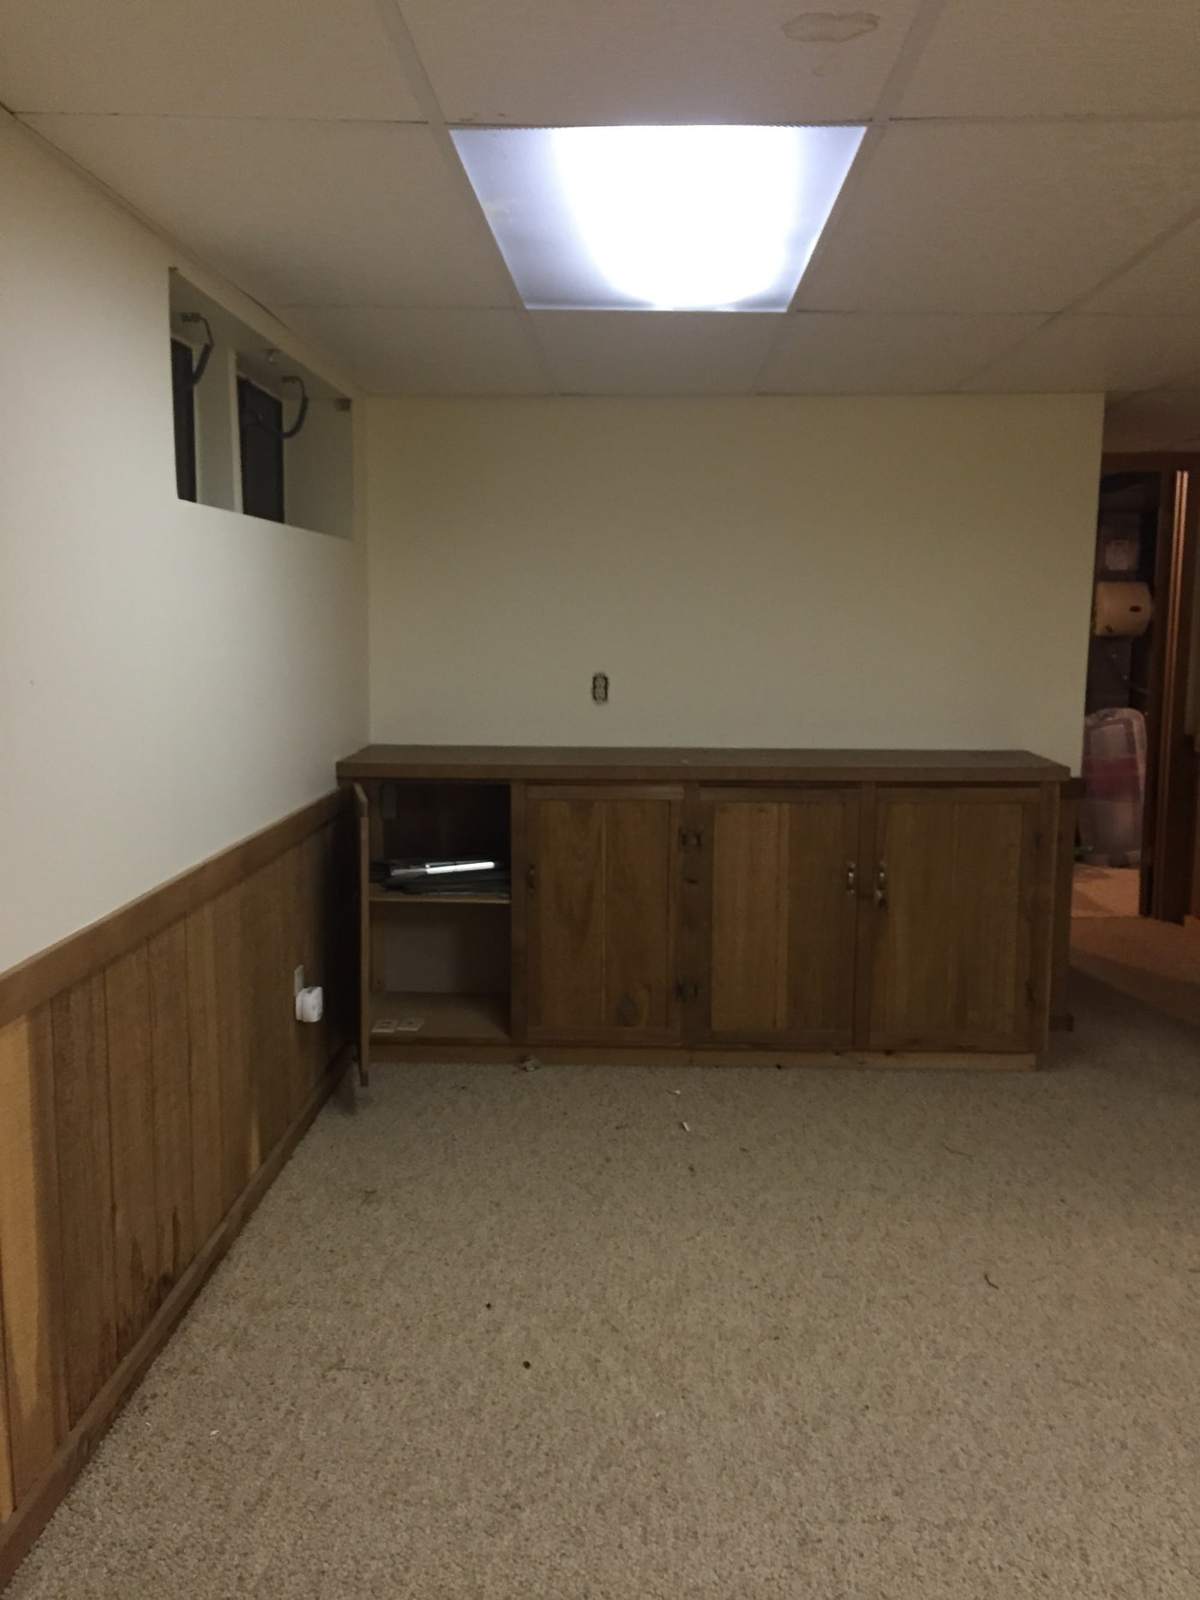
We immediately added new LVP flooring and painted the space in Farrow and Ball Clunch. Next up: the basement stairs! Because they were clearly cobbled together with a variety of woods, we knew right away that we would paint them.
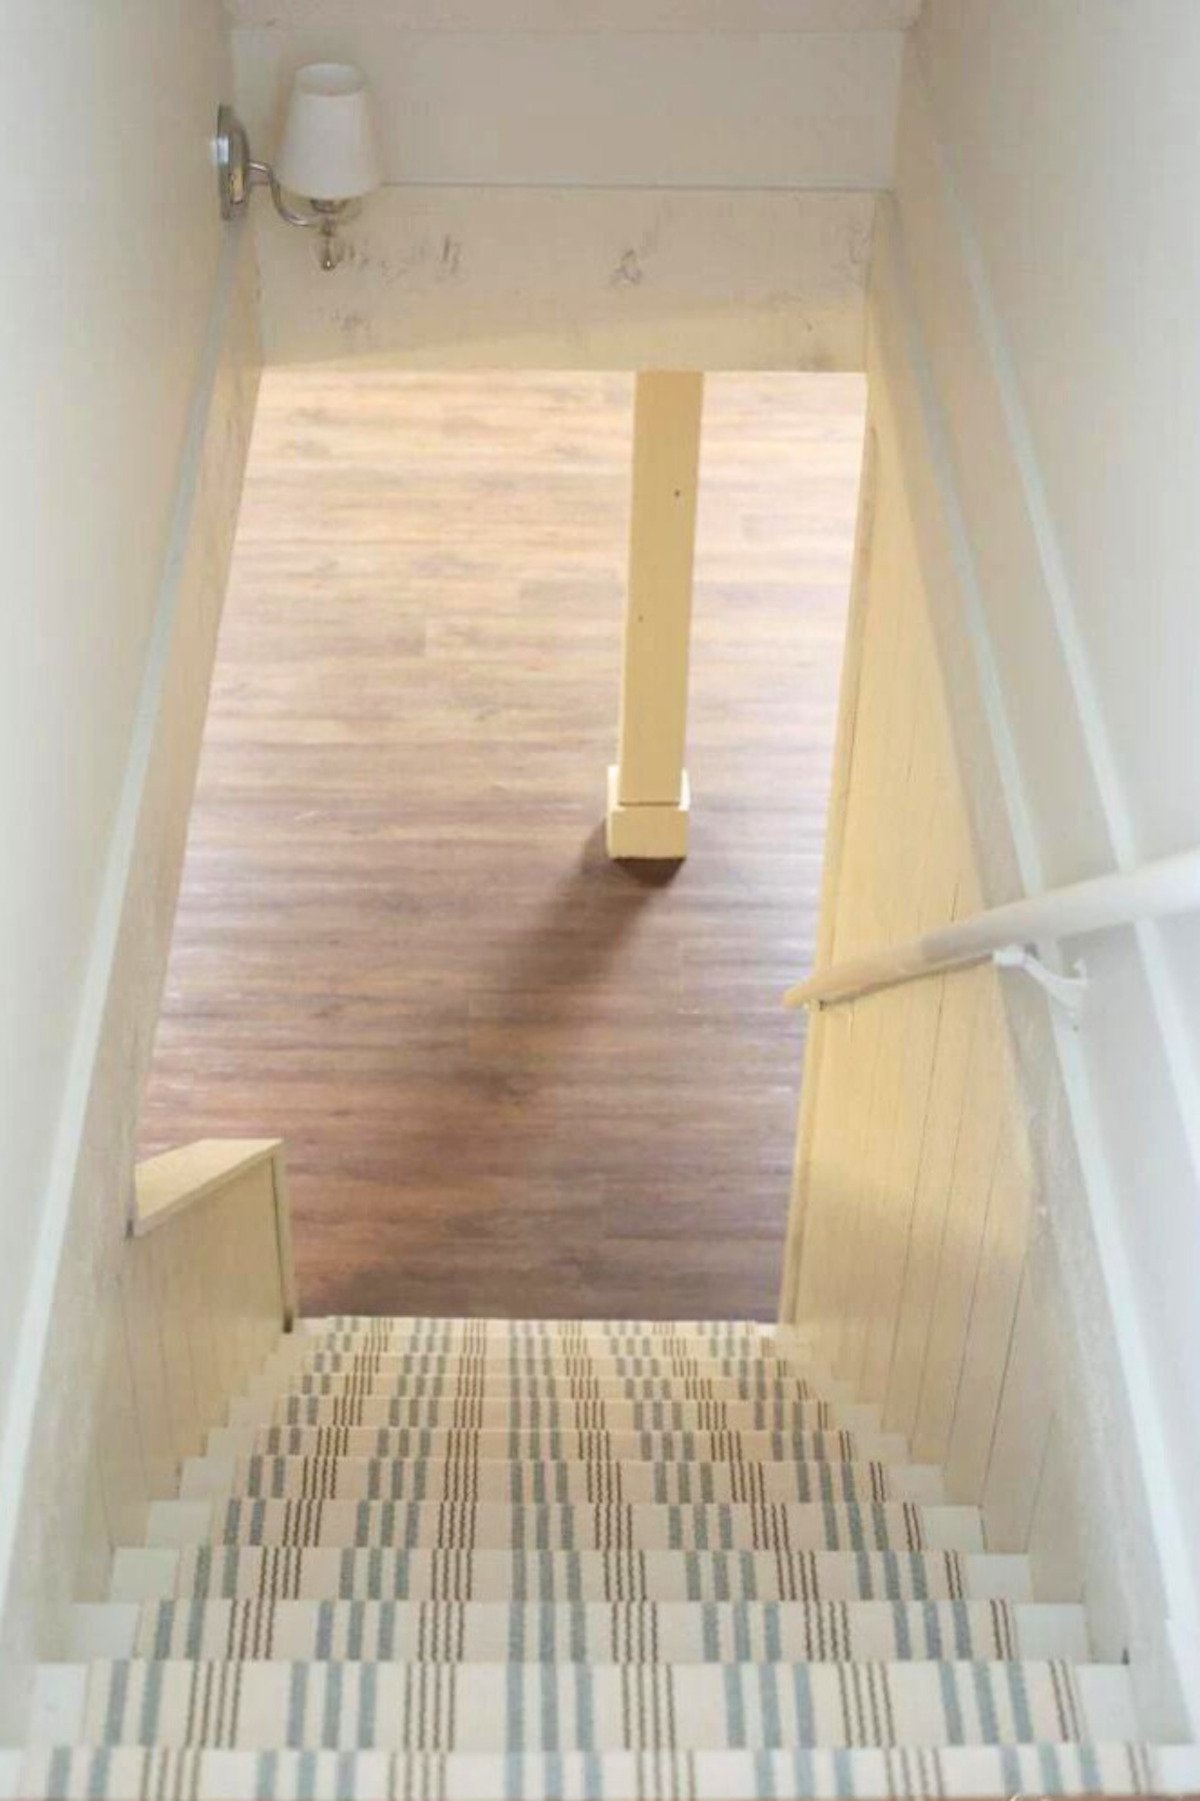
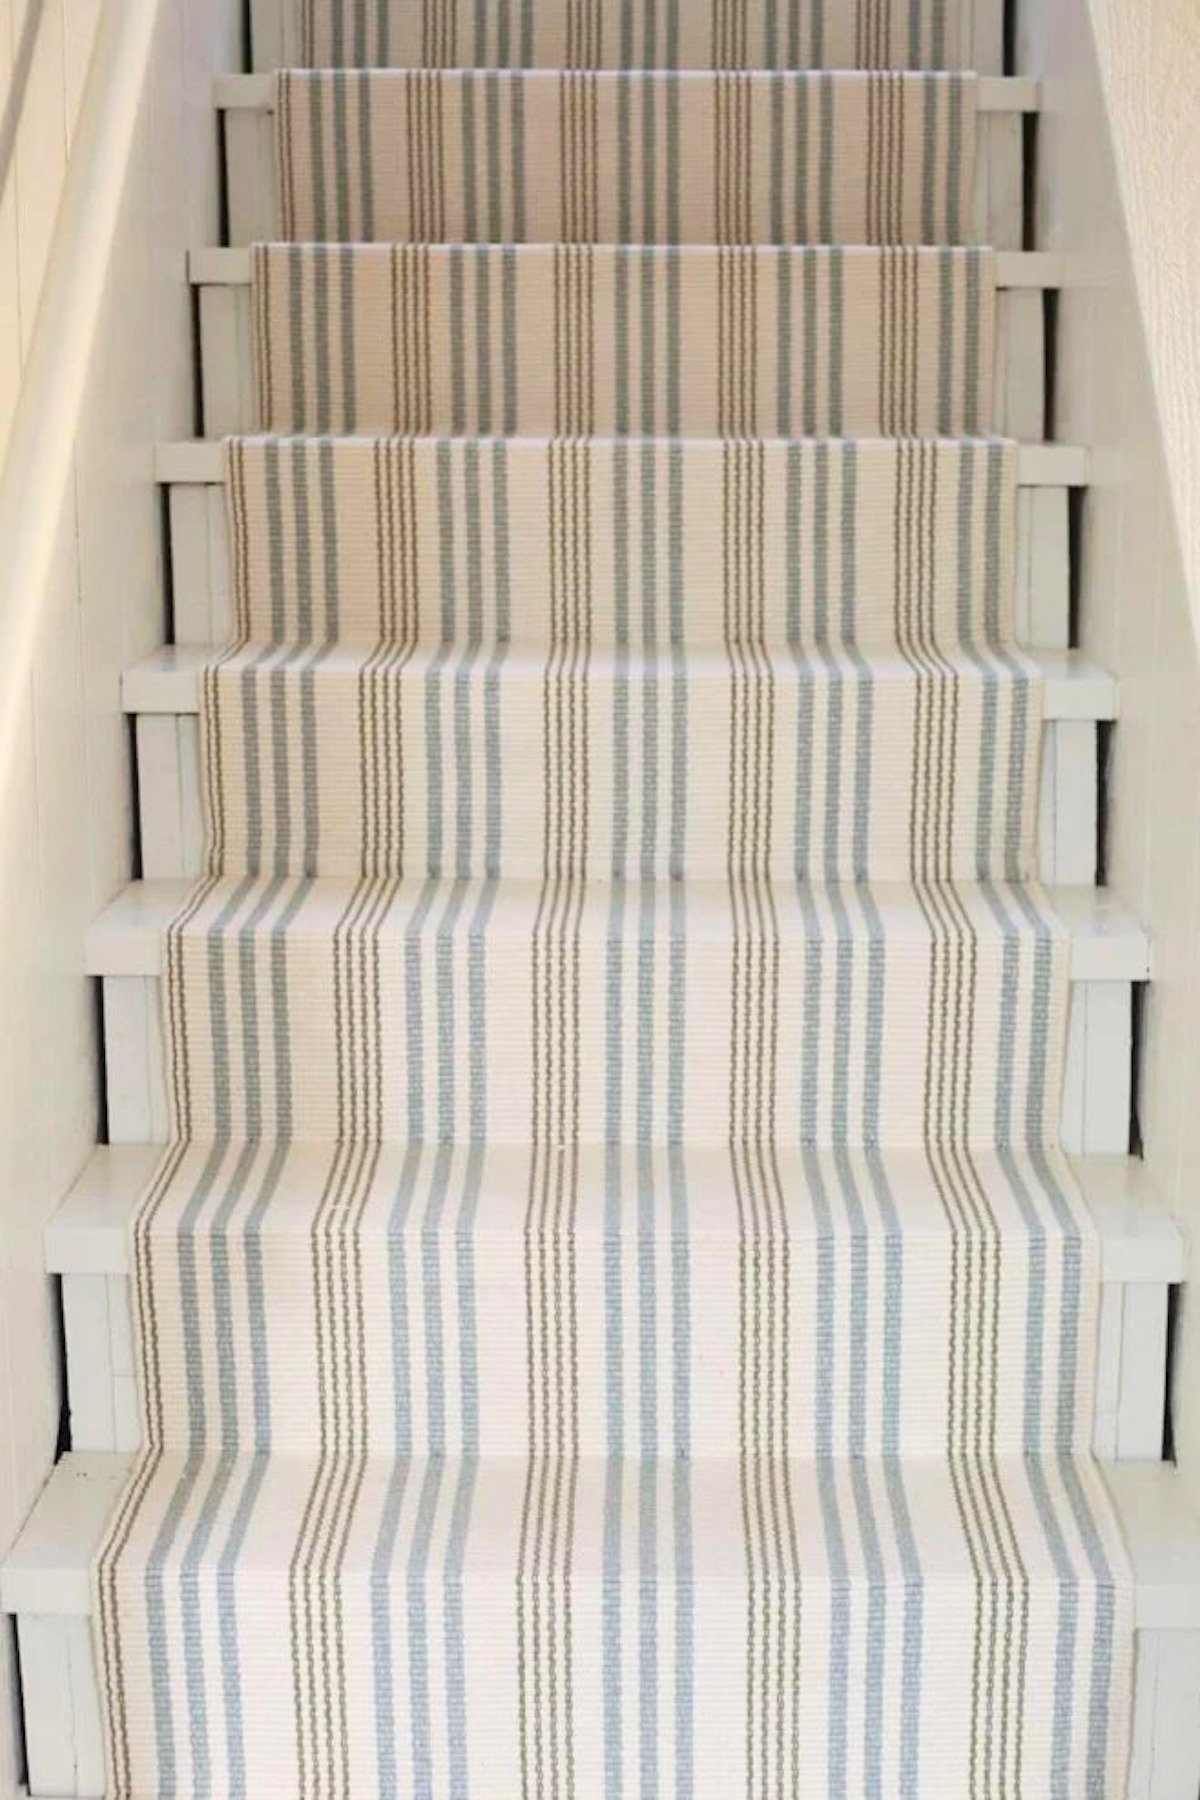
Once we put a coat of paint on the stairs, we decided that investing in a new indoor outdoor stair runner would be the best DIY staircase makeover! The striped stair runner look is one of my favorites, and this was such an inexpensive, easy way to accomplish the look.
Here, you can see the basement as it has progressed over the years. It was originally a dark and dreary place. We did a quick update with LVP and paint, and added this striped runner.
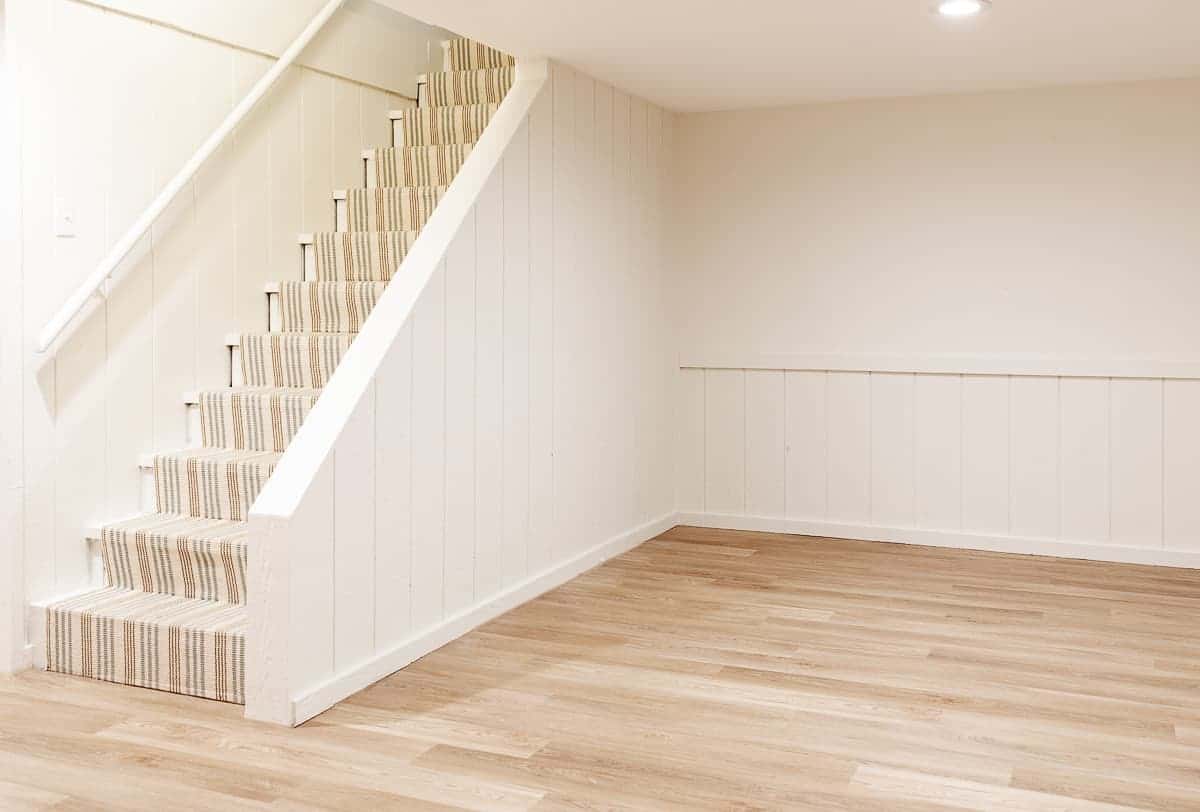
We want the basement to be a comfortable place where the girls and their friends can play and create without fear and burn off some energy on rainy days. It worked well for that purpose for several years. And then, we had a little flood.
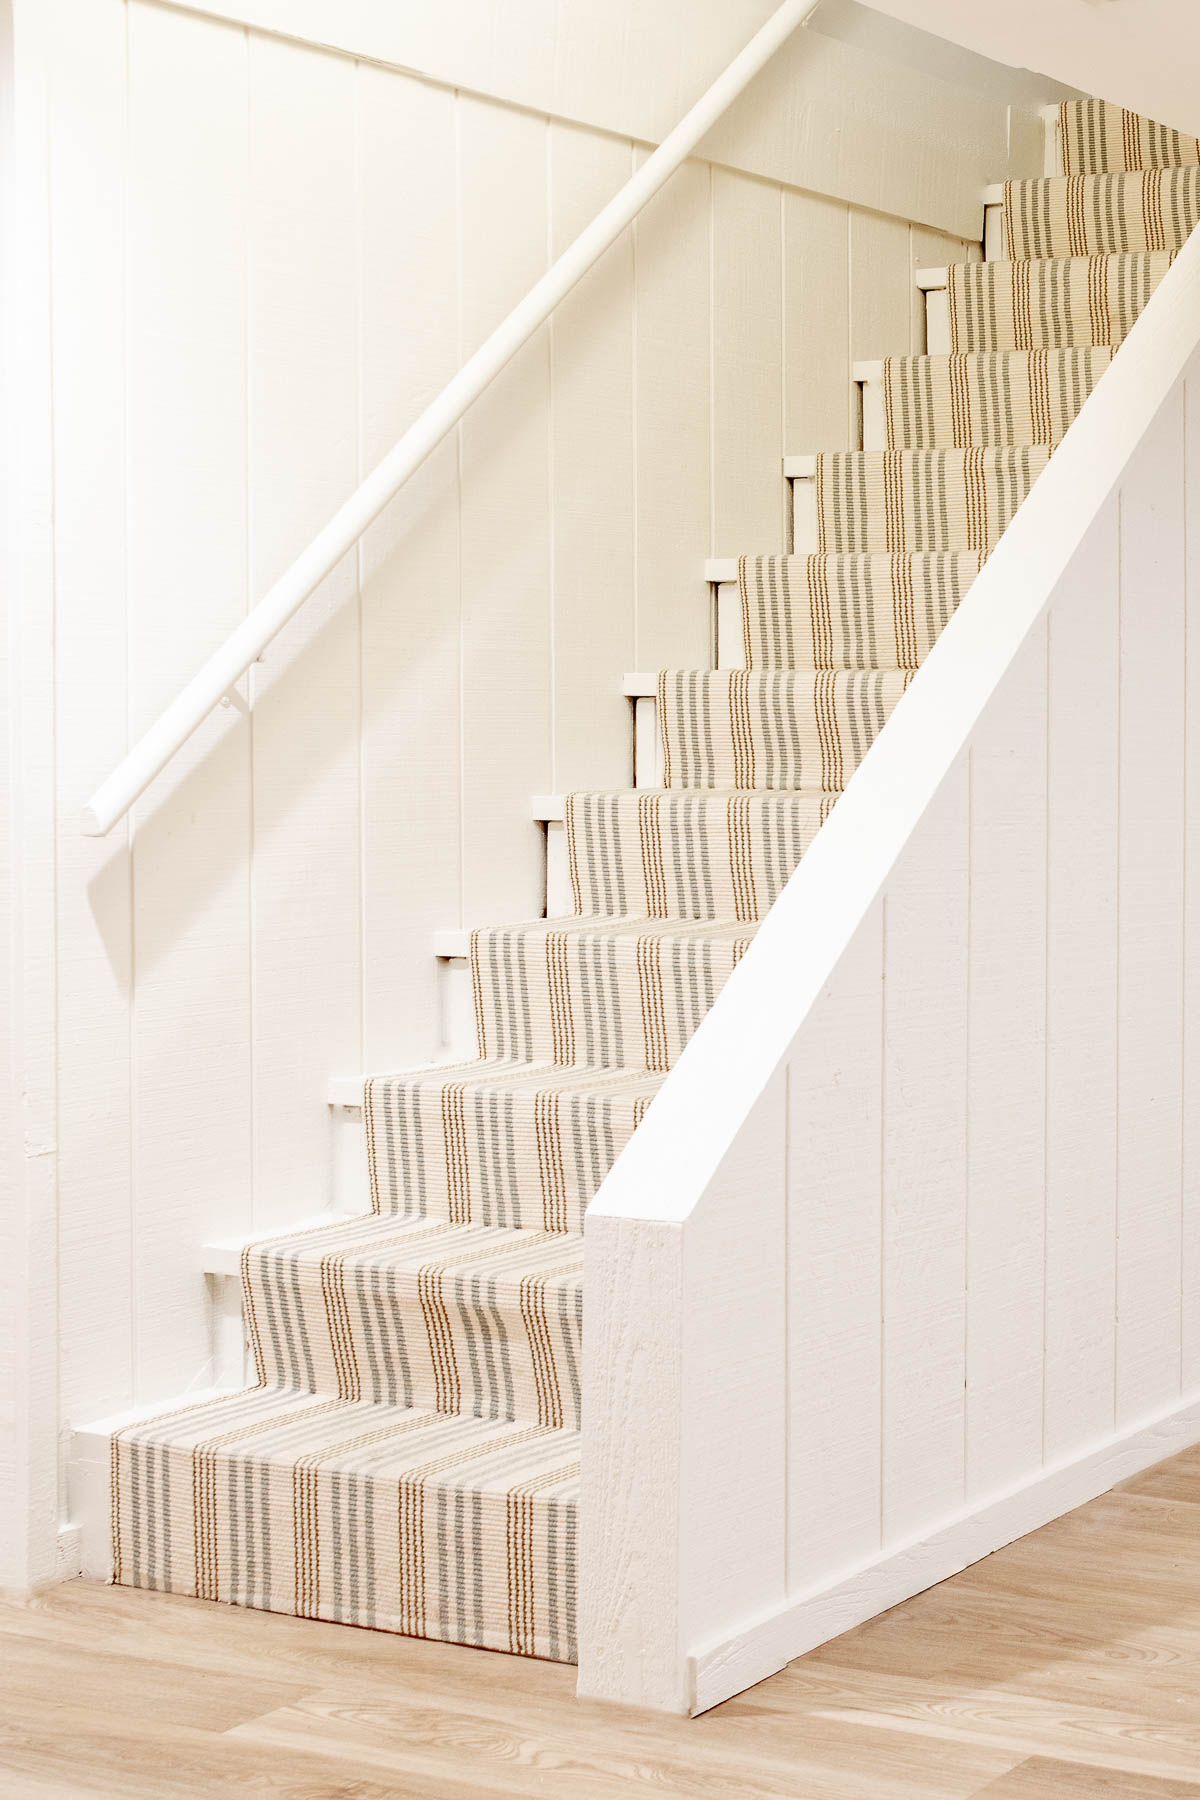
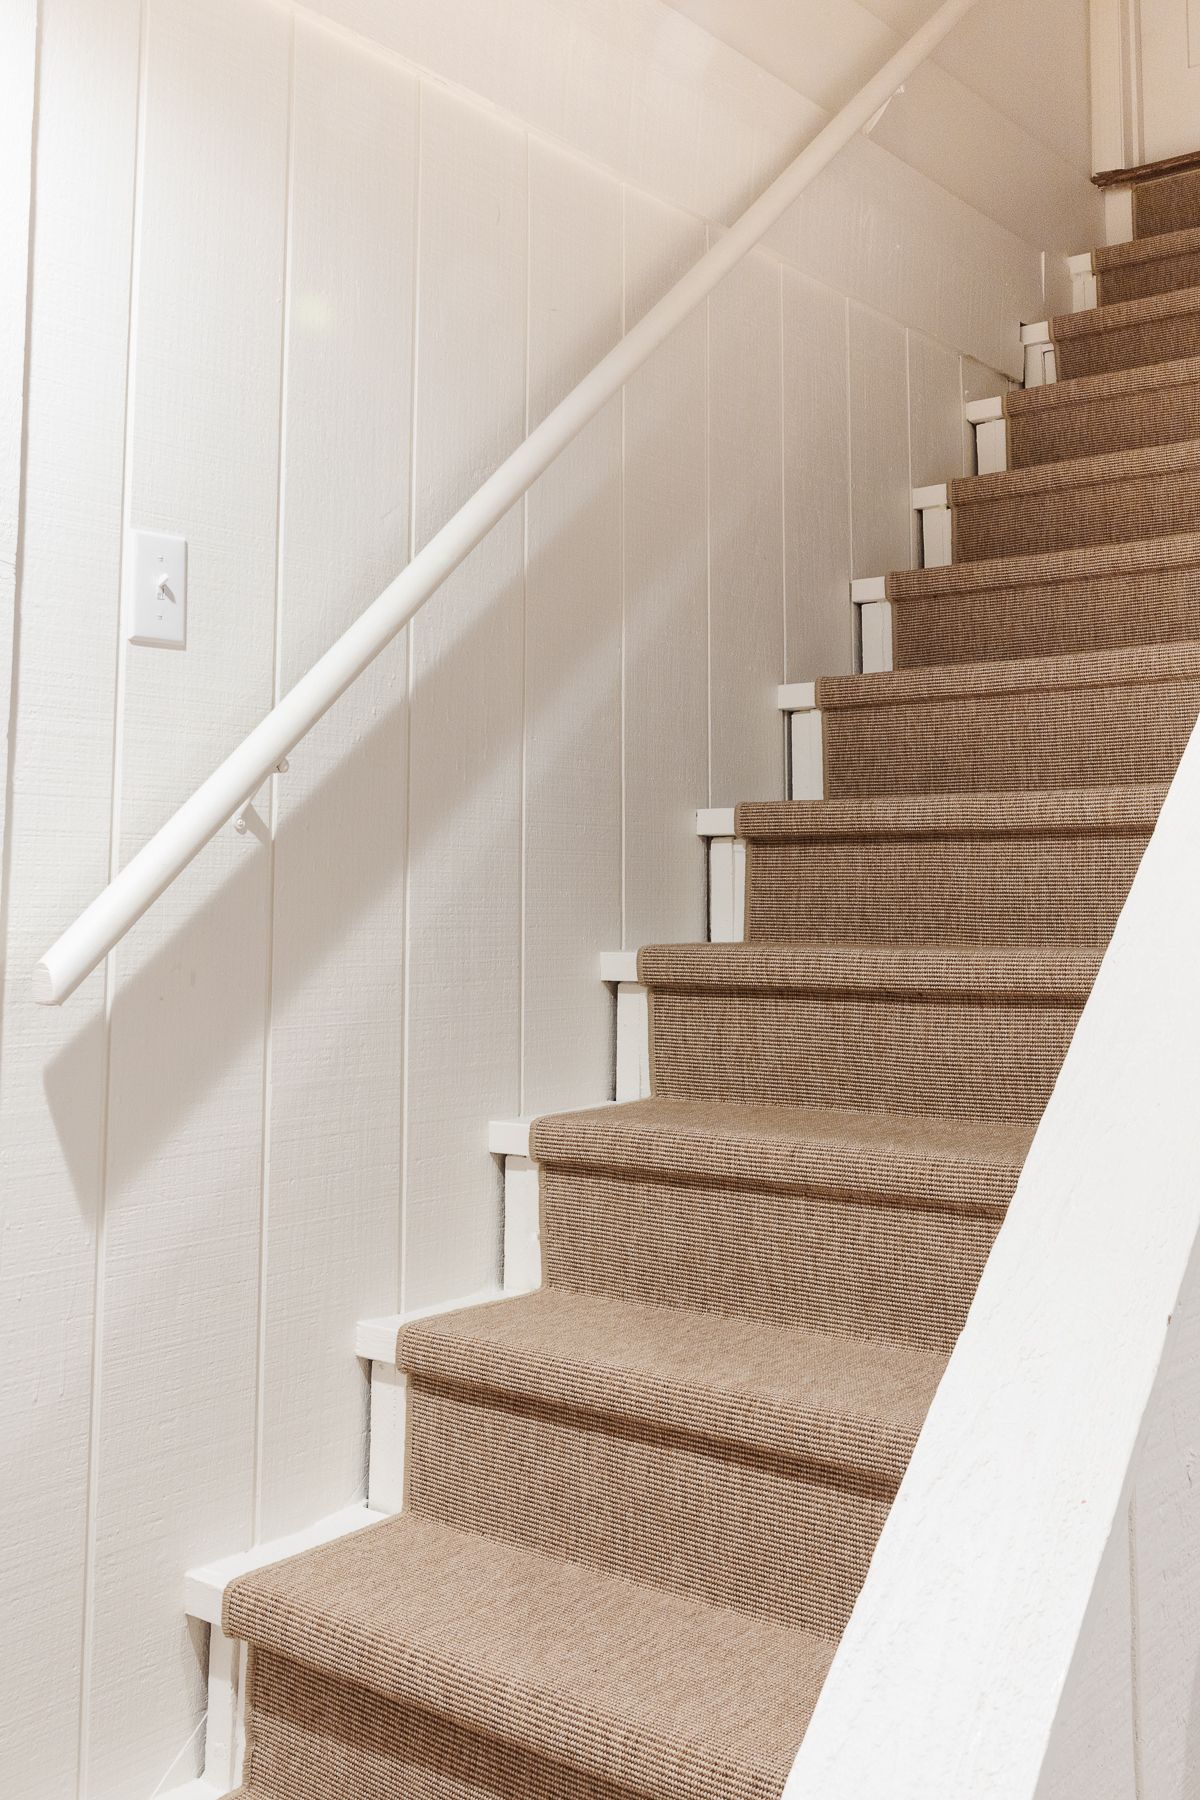
After our basement flooded, we updated to a new lighter LVP, updated the basement bathroom and added a basement bar. We replaced the stair runner again, this time going for a more traditional, neutral look.
DIY Stair Runner
Now that we were taking a more time and cost intensive approach to the basement renovations, we realized our beloved striped stair runner needed an upgrade too.
Luckily, my indecisive nature finally paid off. I had purchased a sisal look indoor outdoor runner years ago, that we had intended to add to our main staircase. We never got around to it, and it worked beautifully for the basement stairs.
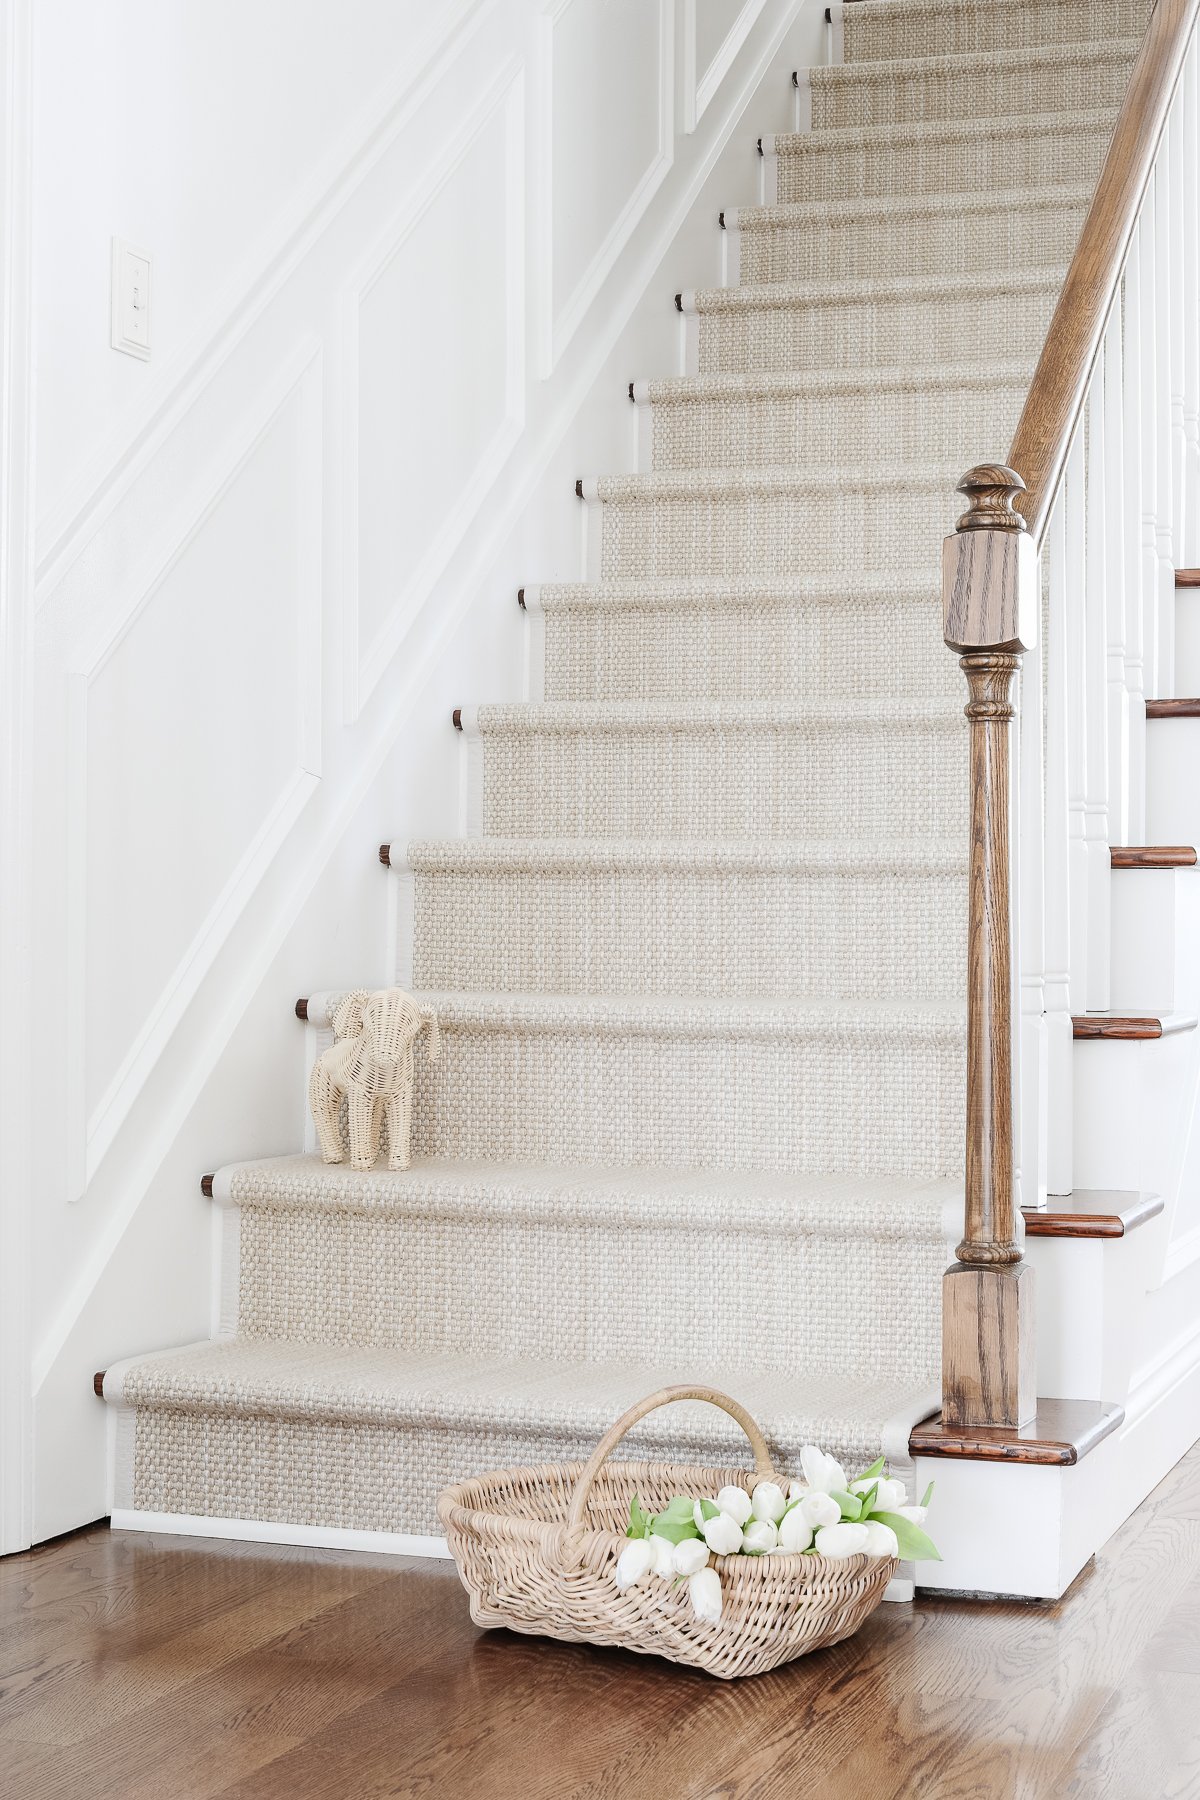
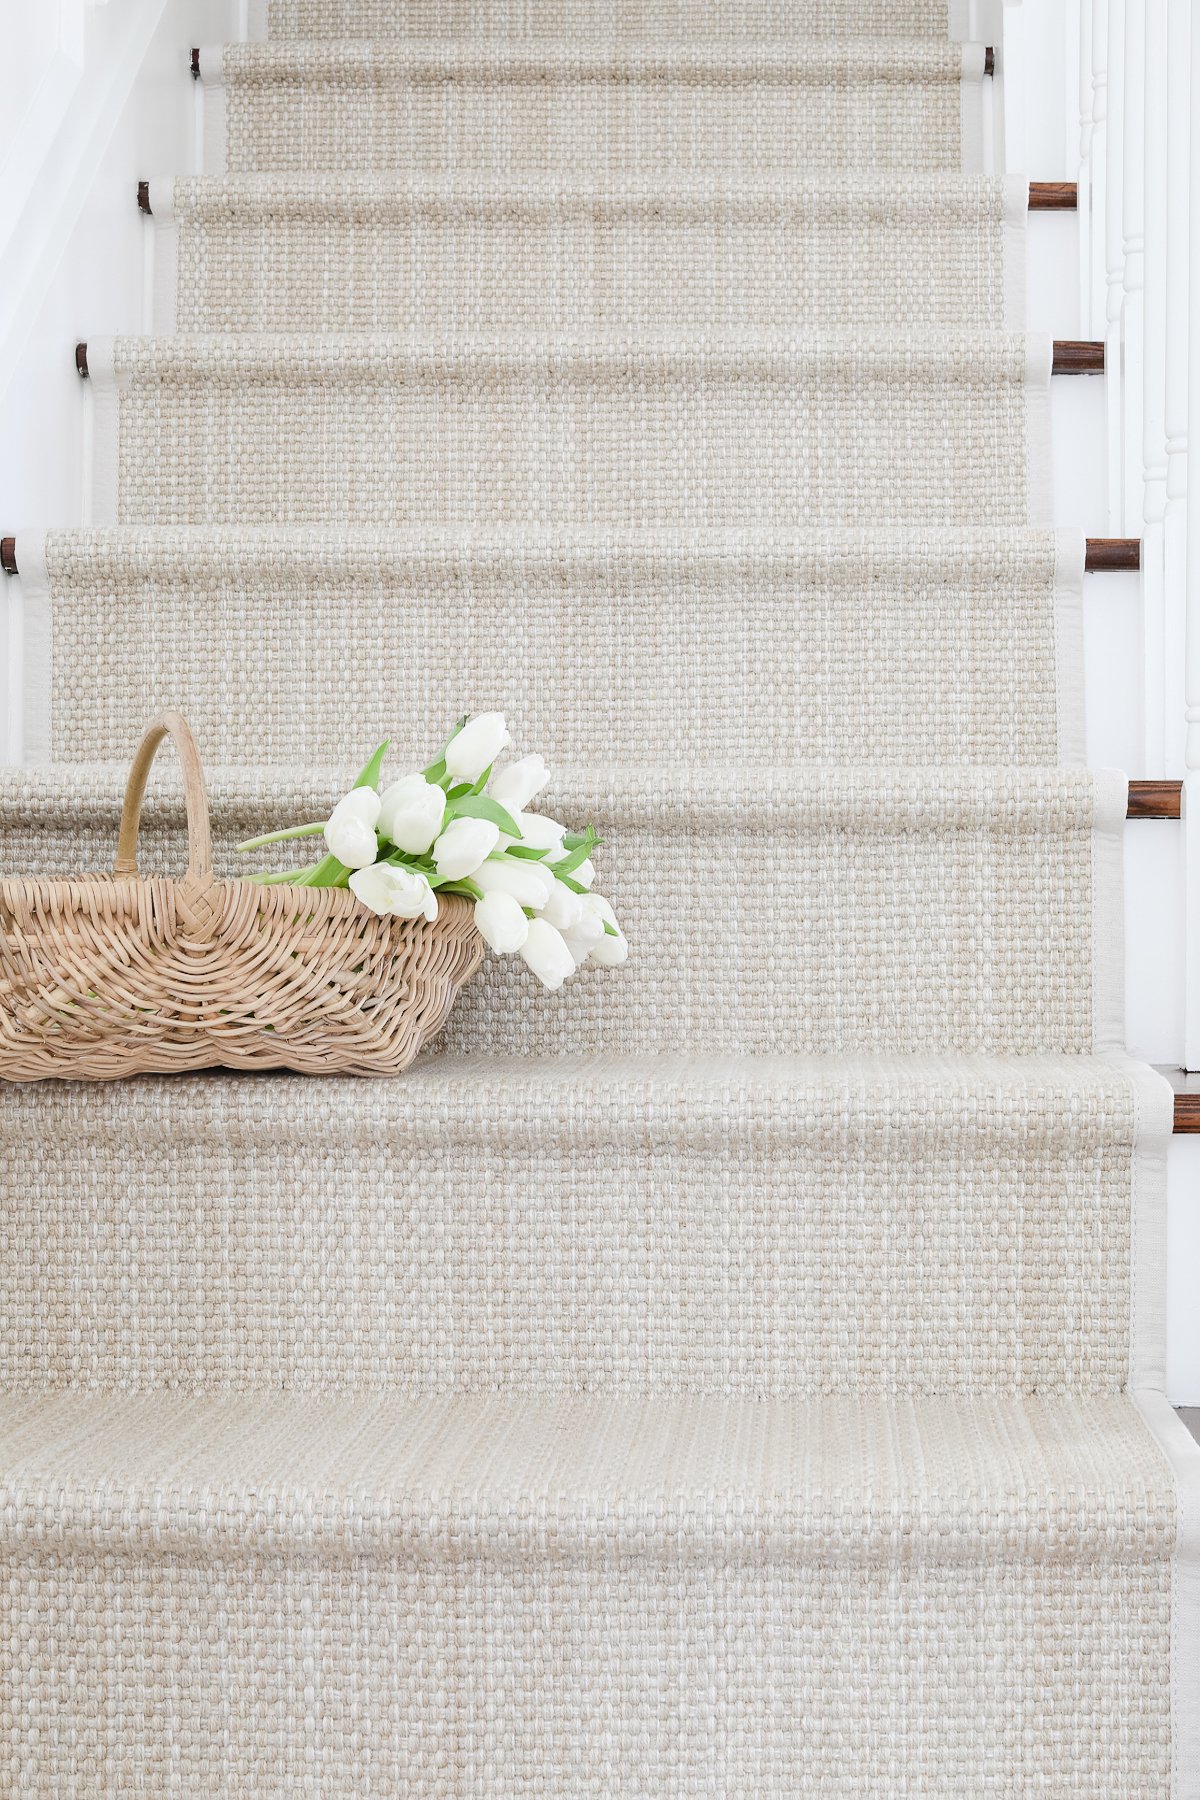
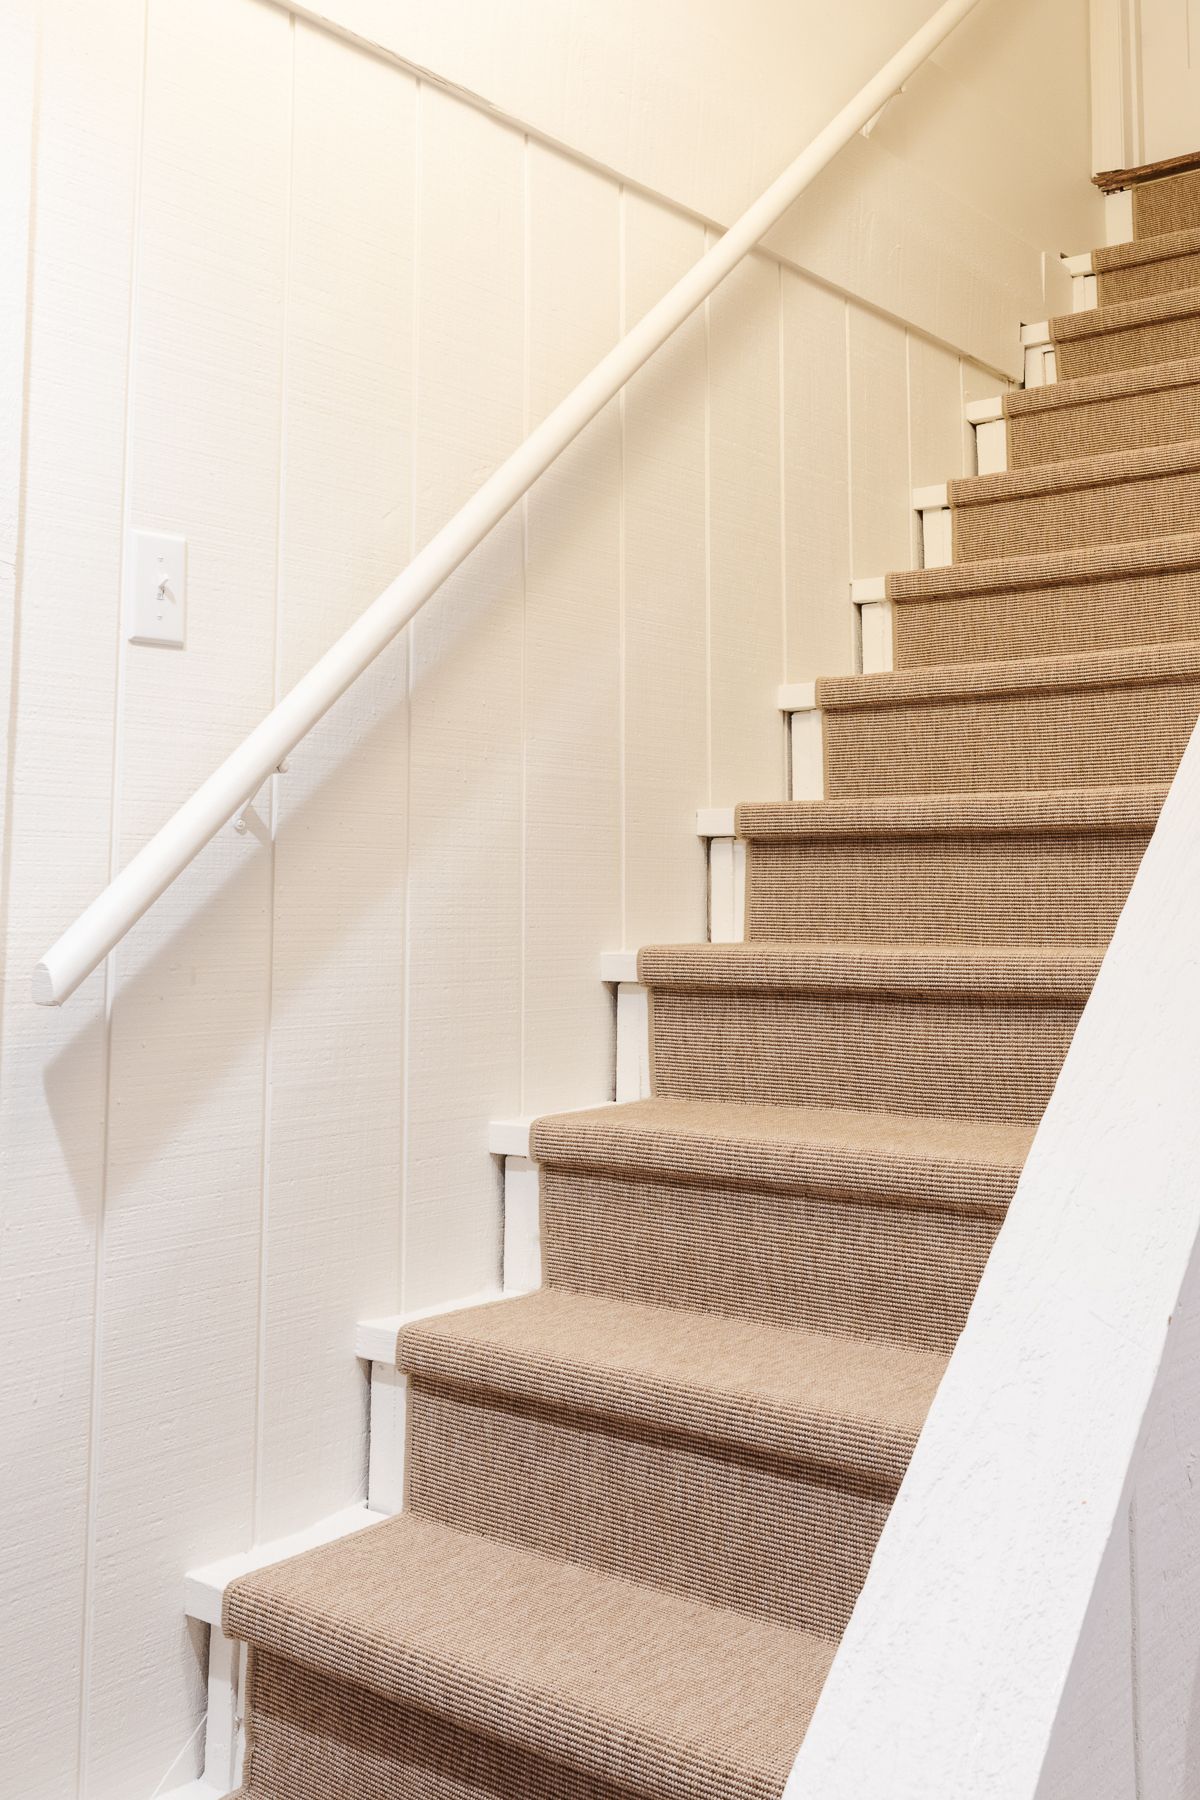
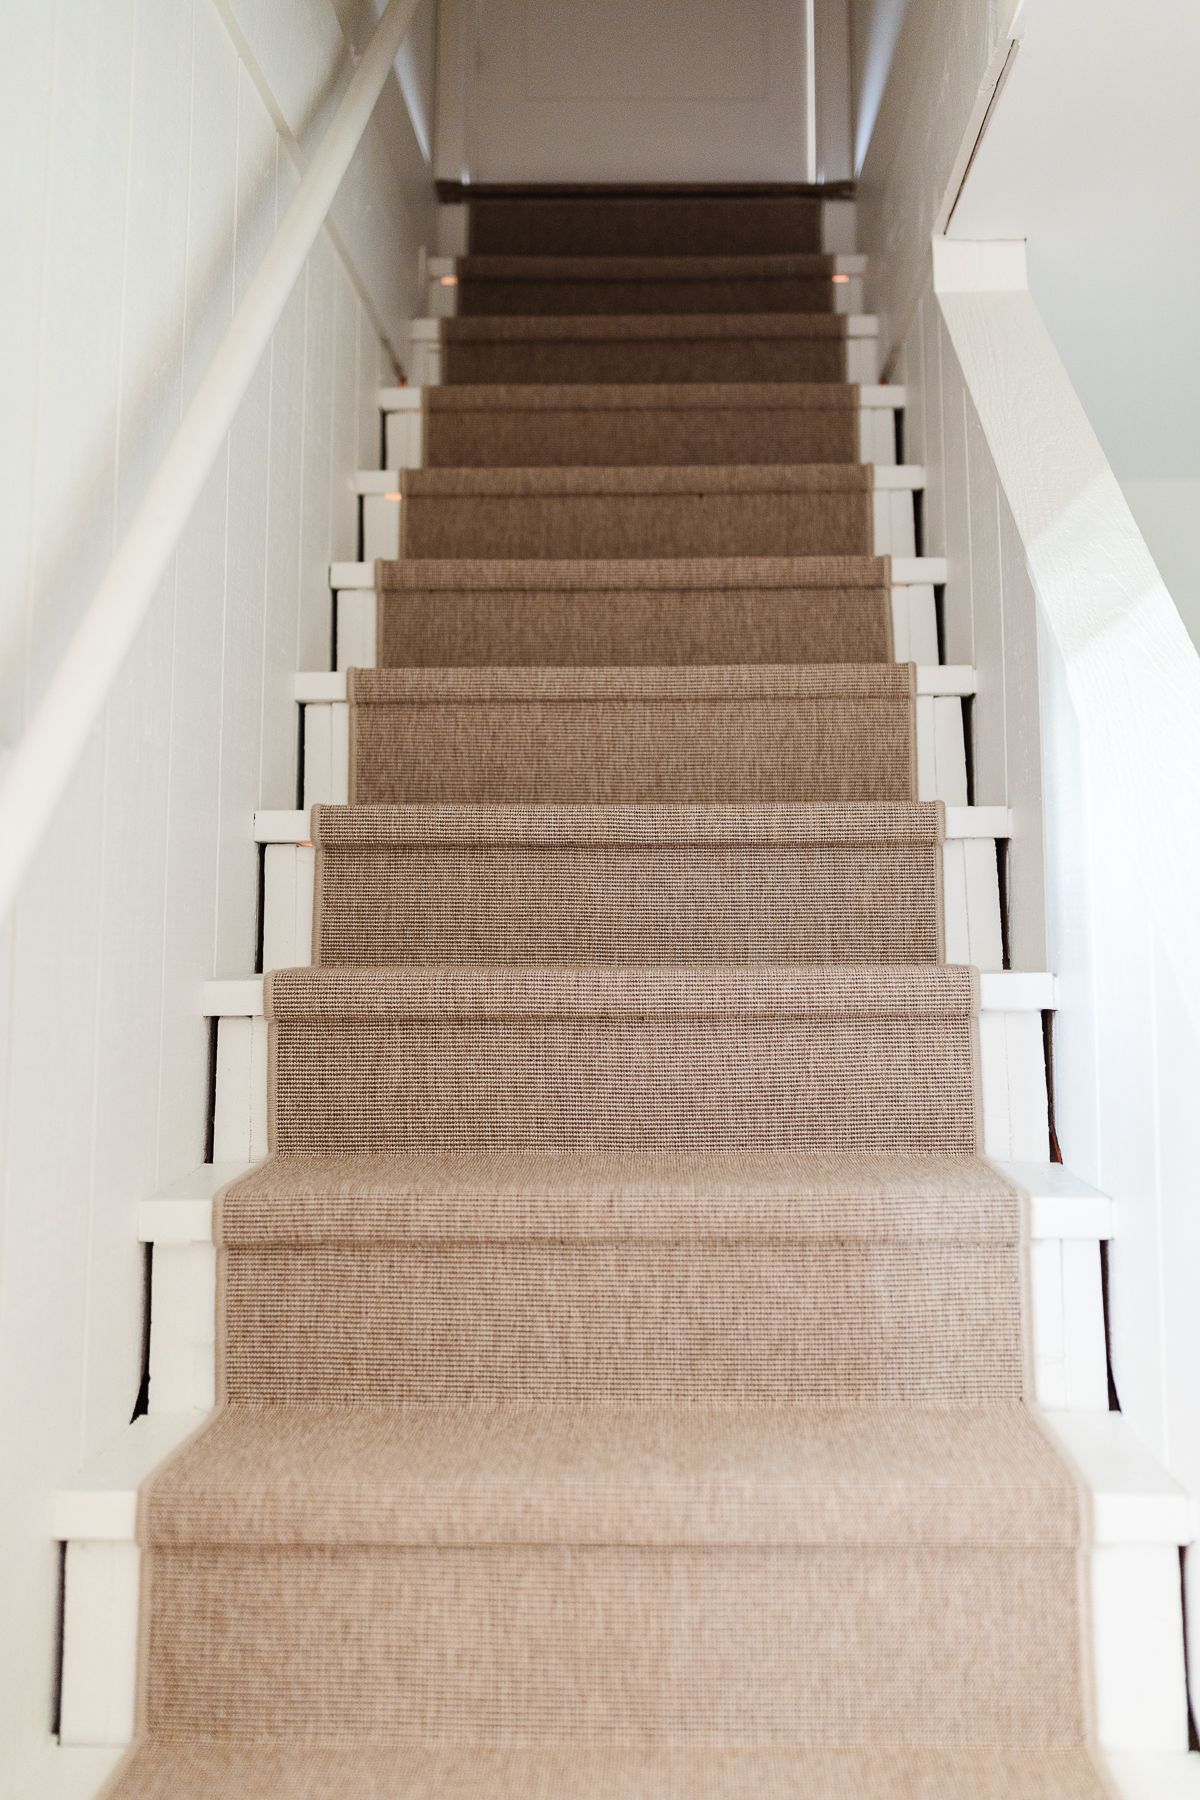
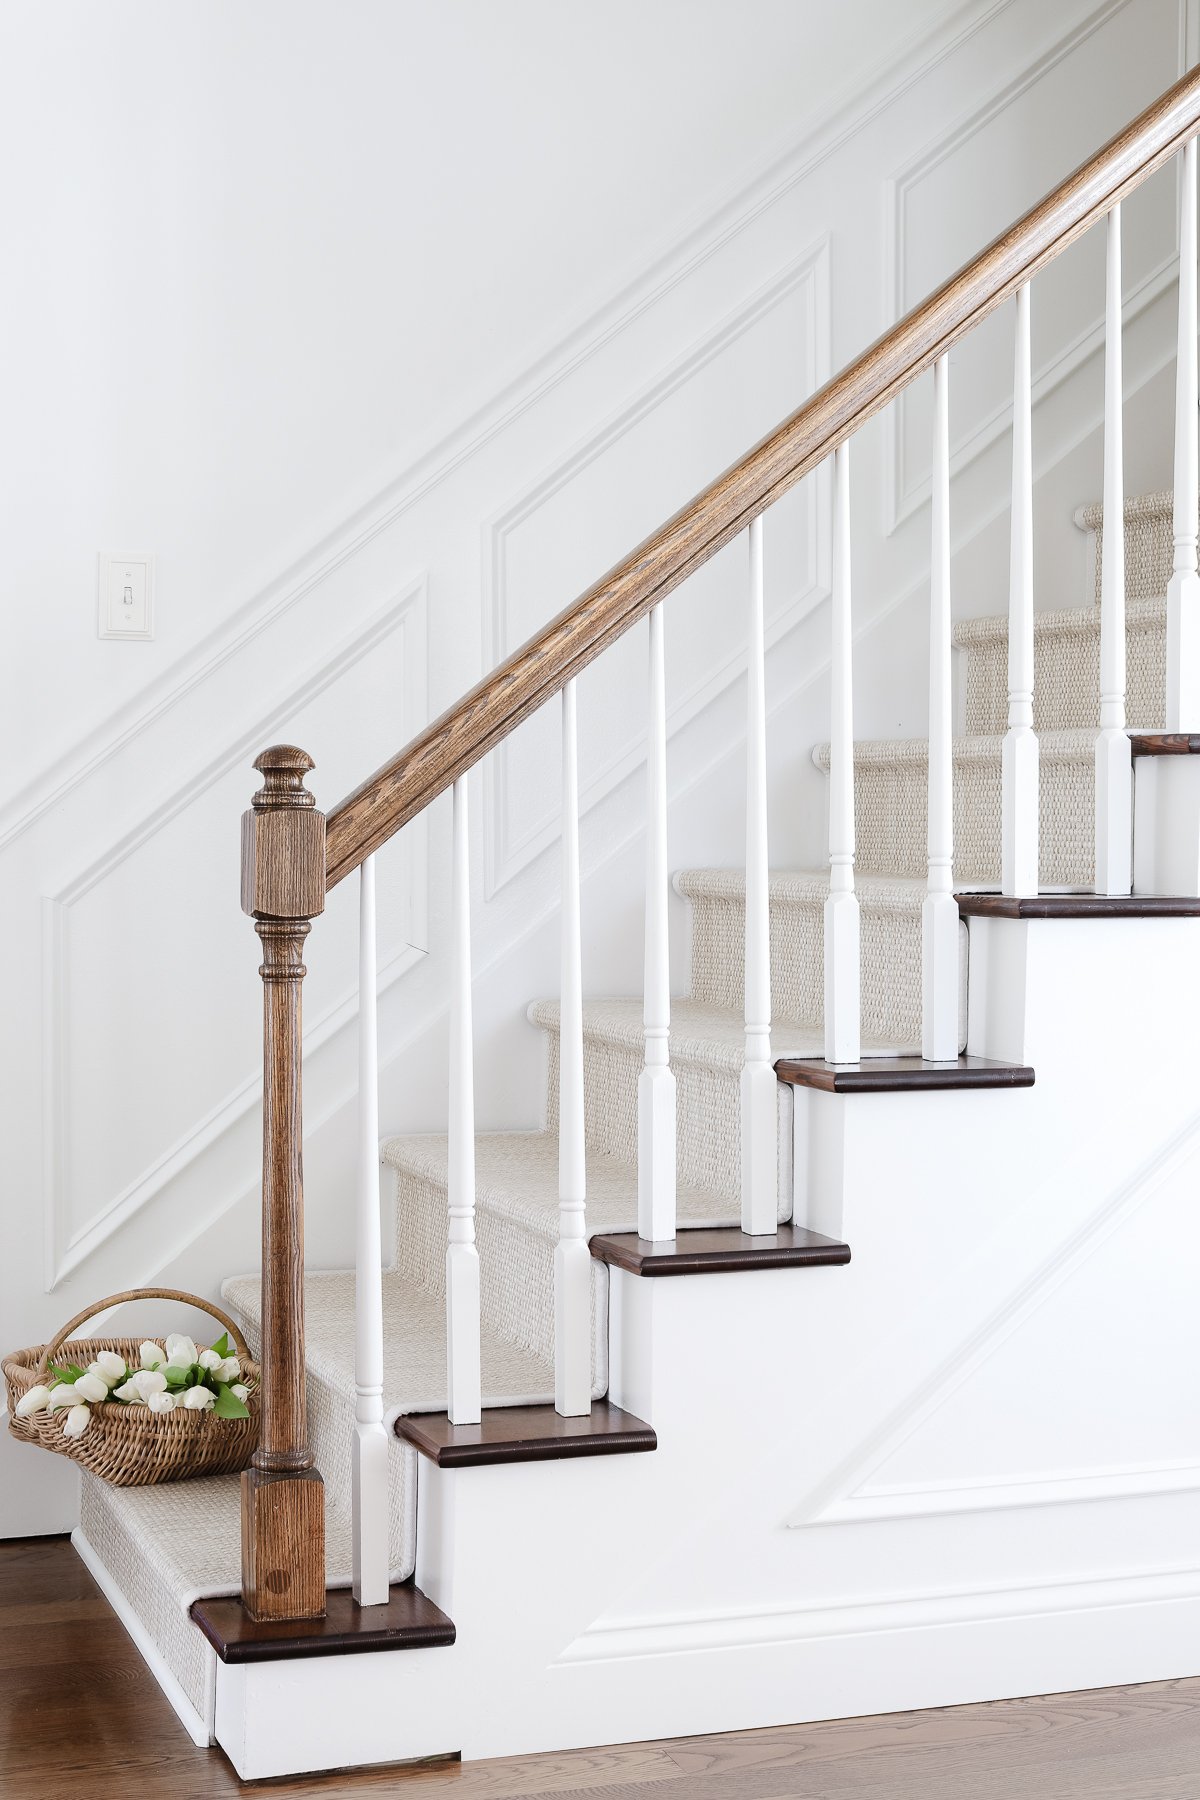
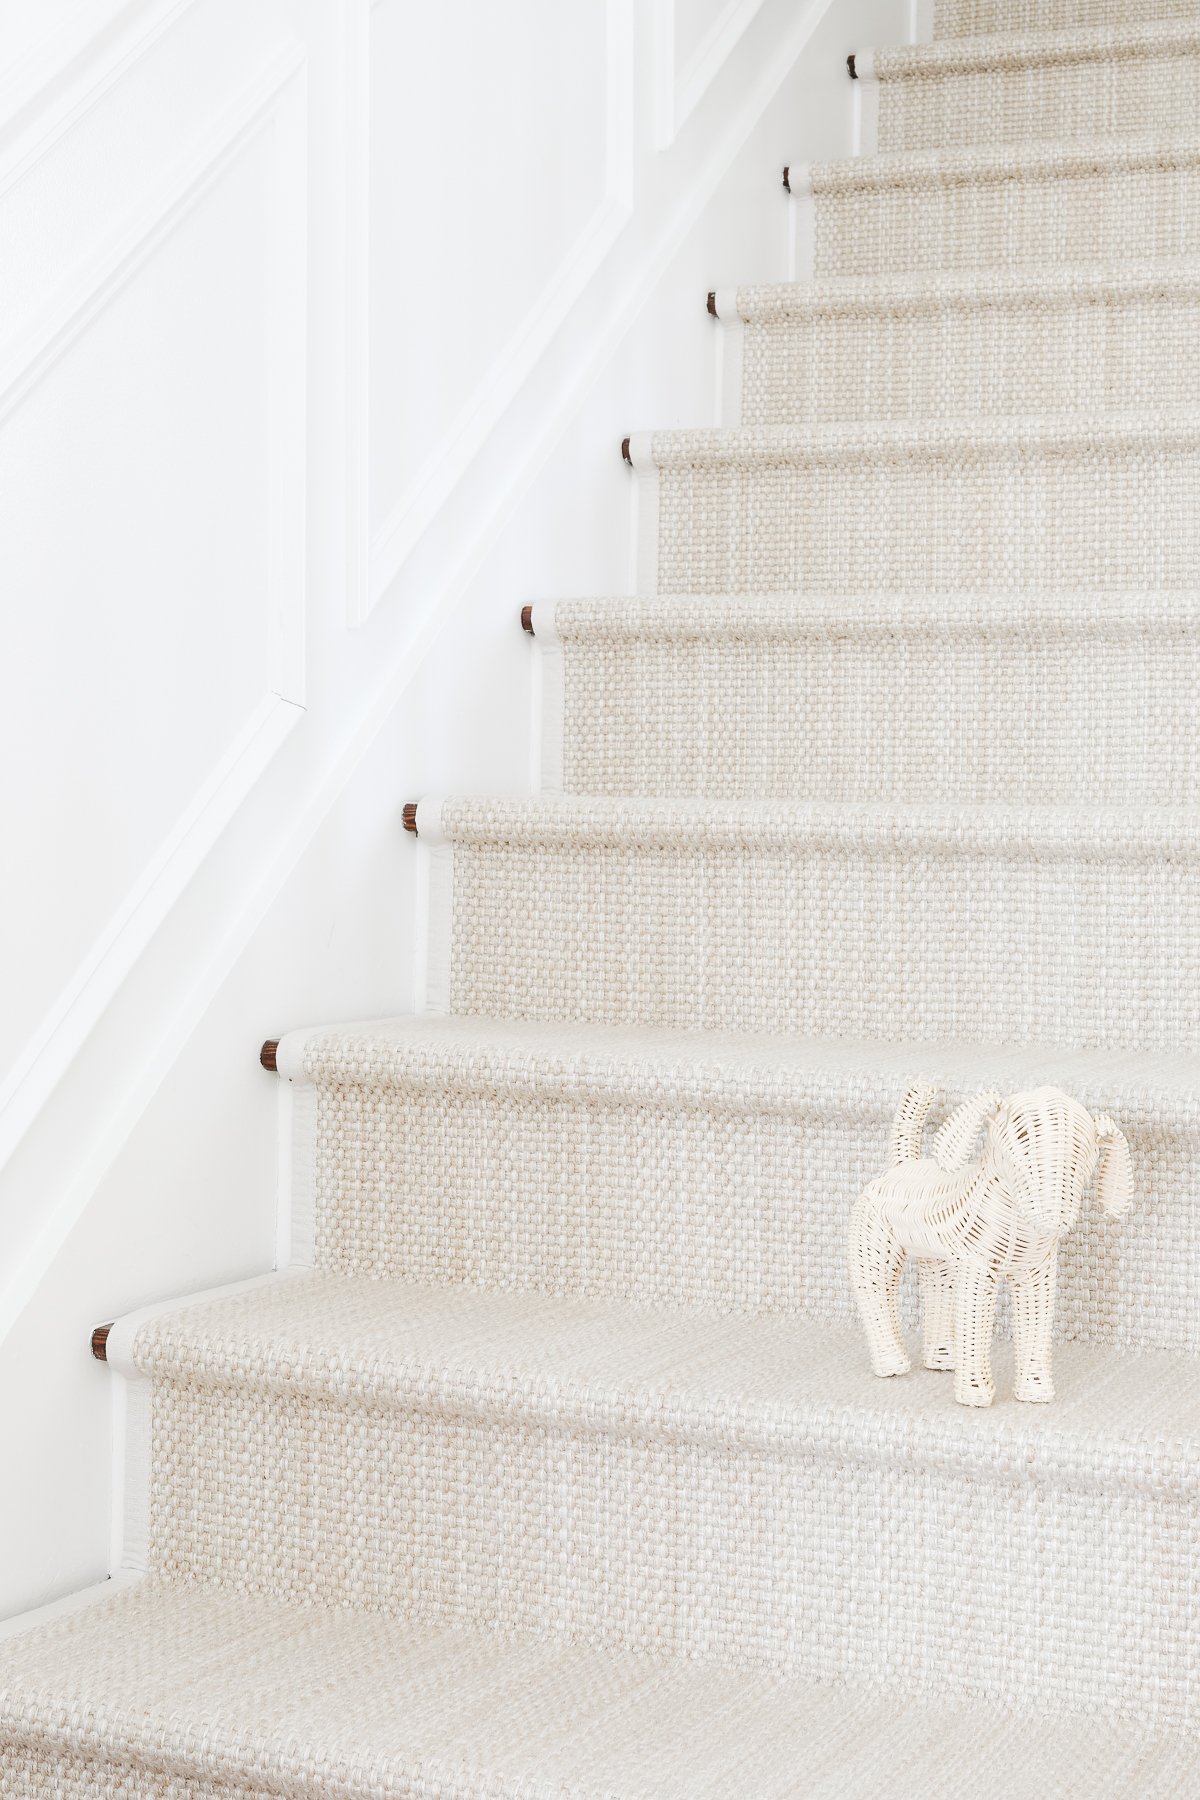
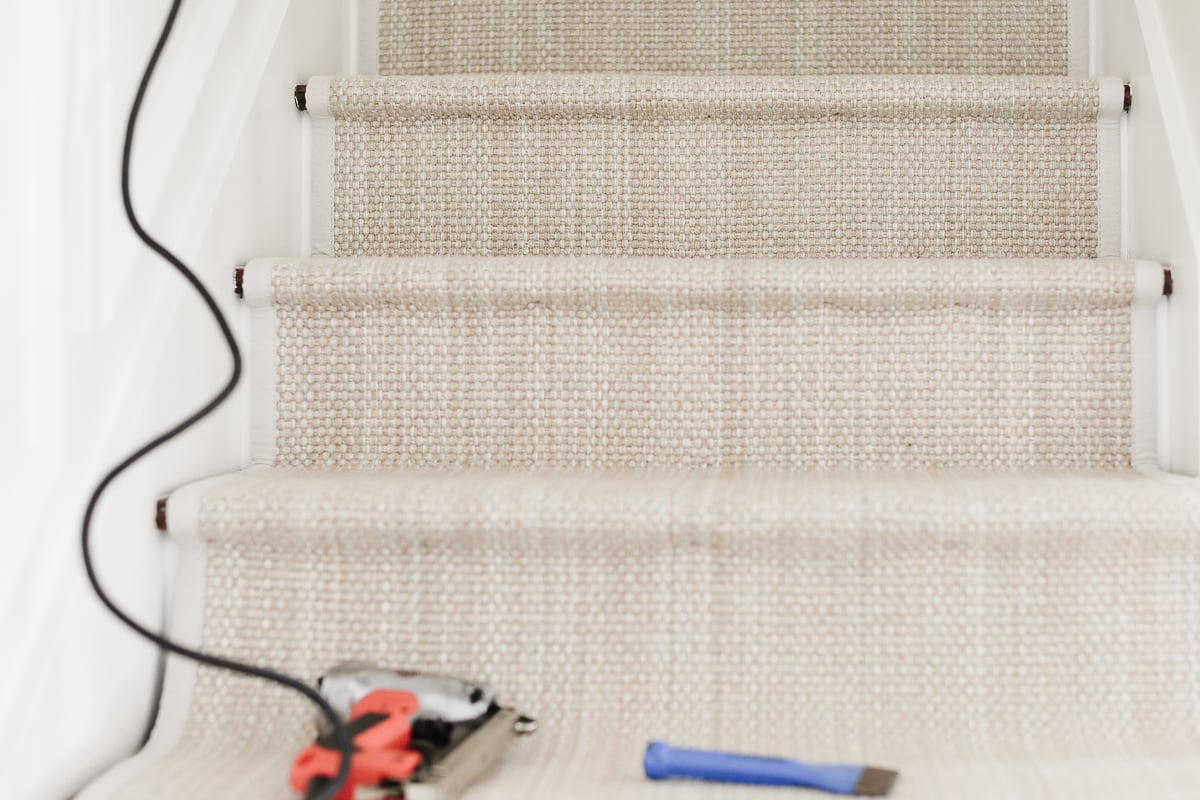
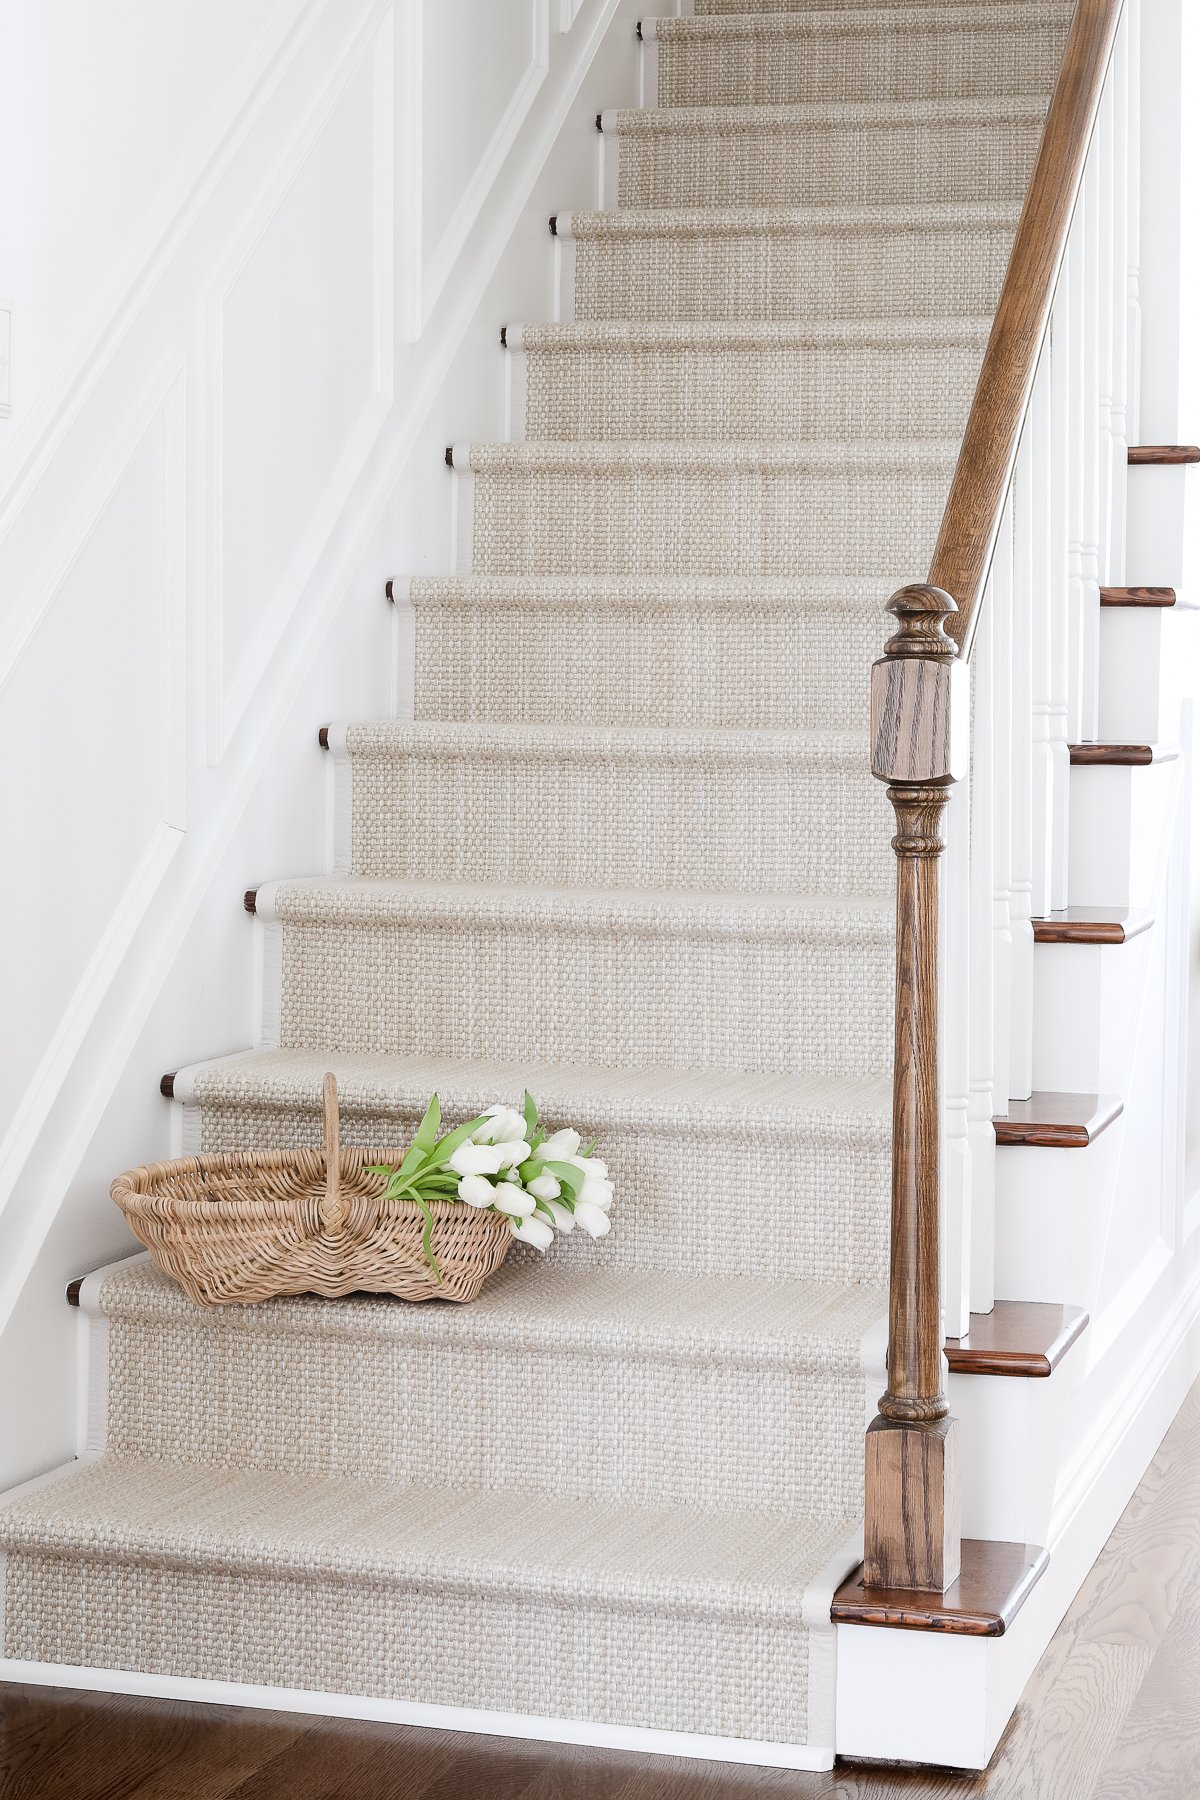
Most recently, we added a new stair runner to the stairs in our entryway. The runner we chose matches our living room rug, which is an easy-to-clean sisal that we love.
Indoor Outdoor Runners for Staircases
Indoor Outdoor Rugs are incredibly easy to clean. You can wipe them down with water and mild dish soap or hose them down when they need a thorough cleaning.
- easy to clean – with water or soap (if needed)!
- inexpensive
- easy to install
DIY Stair Runner Project Materials
Most treads and risers (the steps themselves and the board that connects them) are never intended to see the light of day.
Builders use leftover materials, broken or ill fitted boards and as we learned the hard way (from our second level stairs), even different species of wood. Still, I was determined. Just because your stairs are ugly, doesn’t mean you need to start from scratch.
Bonus? The project is very affordable to do. The first striped stair runners that we purchased cost us less than $300! Redoing basement stairs isn’t difficult or time consuming.
Tools to Use
- Your stair runner rugs
- Stair padding or tape
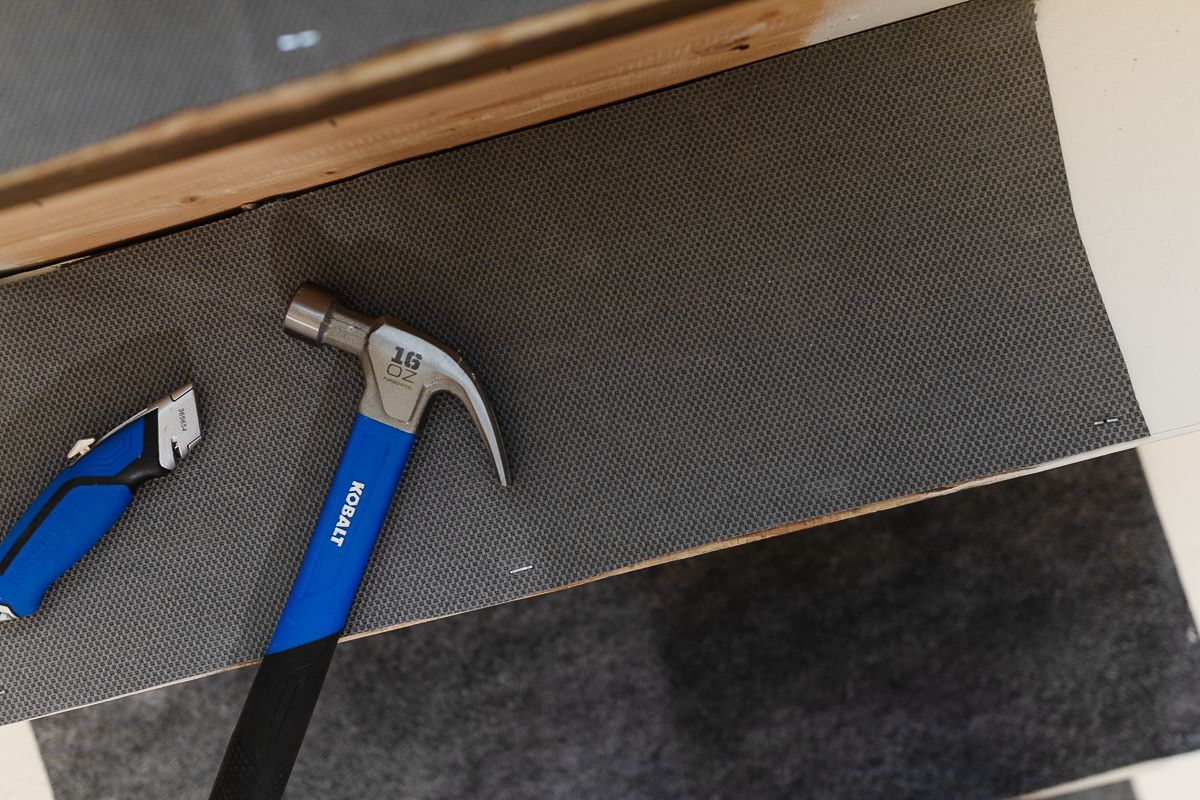
- Carpet Stapler
- Carpet Tucking Tool
- Utility Knife
- Hammer
How to Install Stair Runners
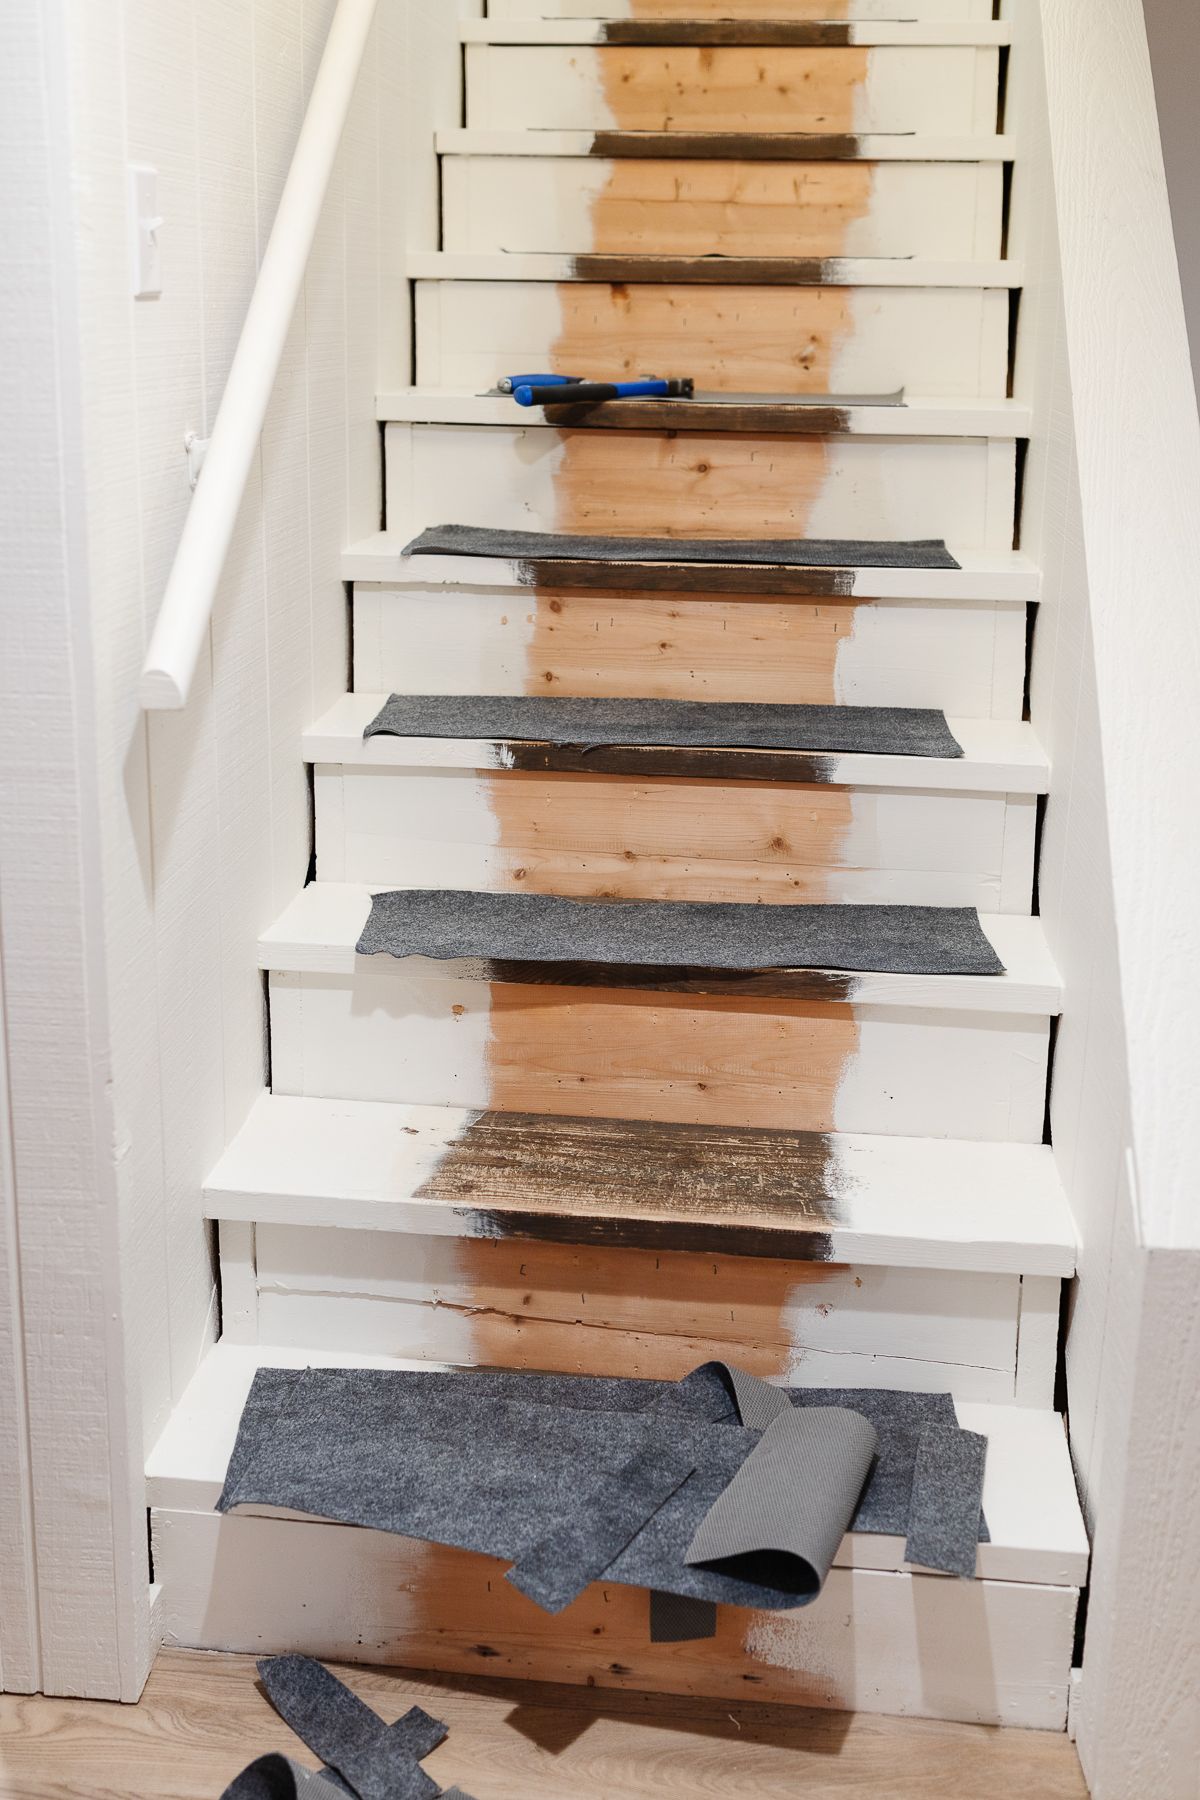
- We started by removing the old, dingy carpet and the ridiculous amount of staples that accumulated through the years as carpet had been replaced. (In the photo above, you can see what we were dealing with prior to installing the original striped stair runner.)
- Measure to get the right amount of stair runner. We measured a tread and riser, added the number together and multiplied the number of stairs to determine how many we needed.
- I centered the runner to gauge just how much area needed to have nails filled, caulked and painted.
- Fill in holes and paint the stairs. Use my favorite tips for Painting Trim to get a clean, solid finish.
- Cut a strip of double-sided tape slightly shorter than the width of the rug and press the tape along the top edge of the riser. Or, add a little rug padding for extra cushioning and stability.
- Line up the runner rug with the tape and press firmly. Carpet tacks should be used next hold the rug in place.
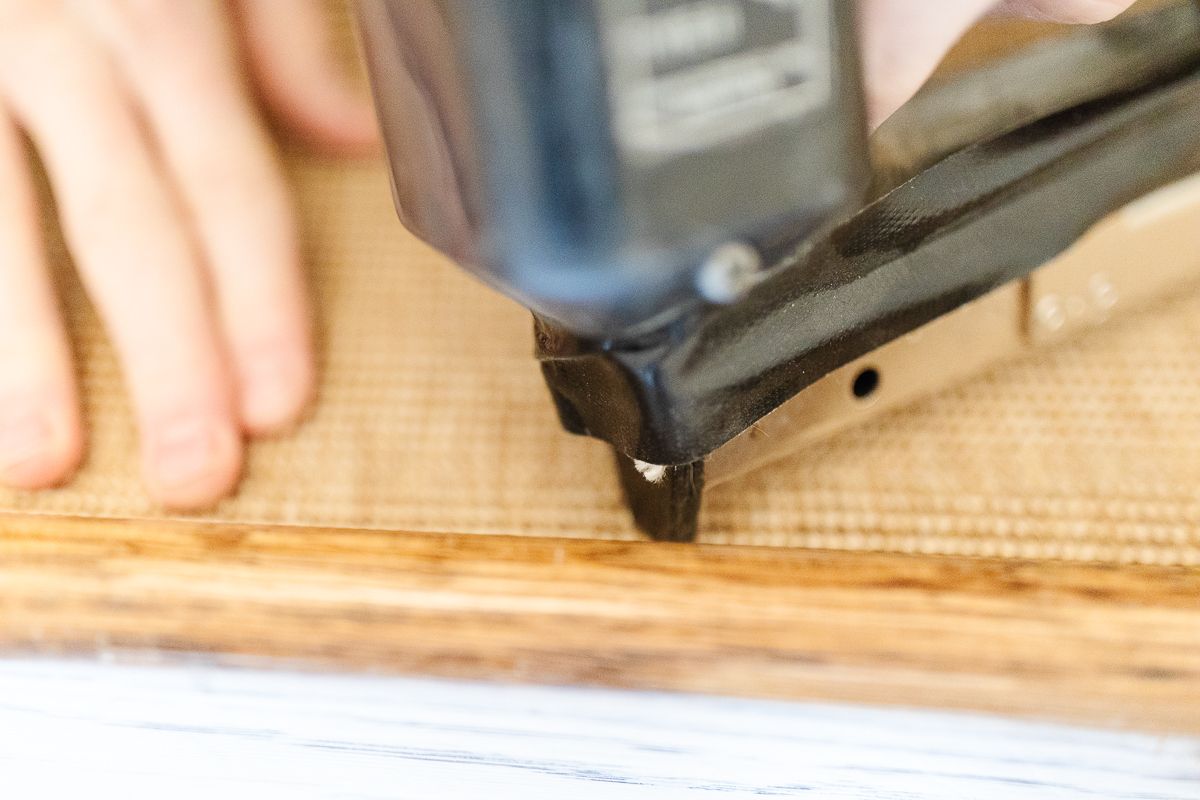
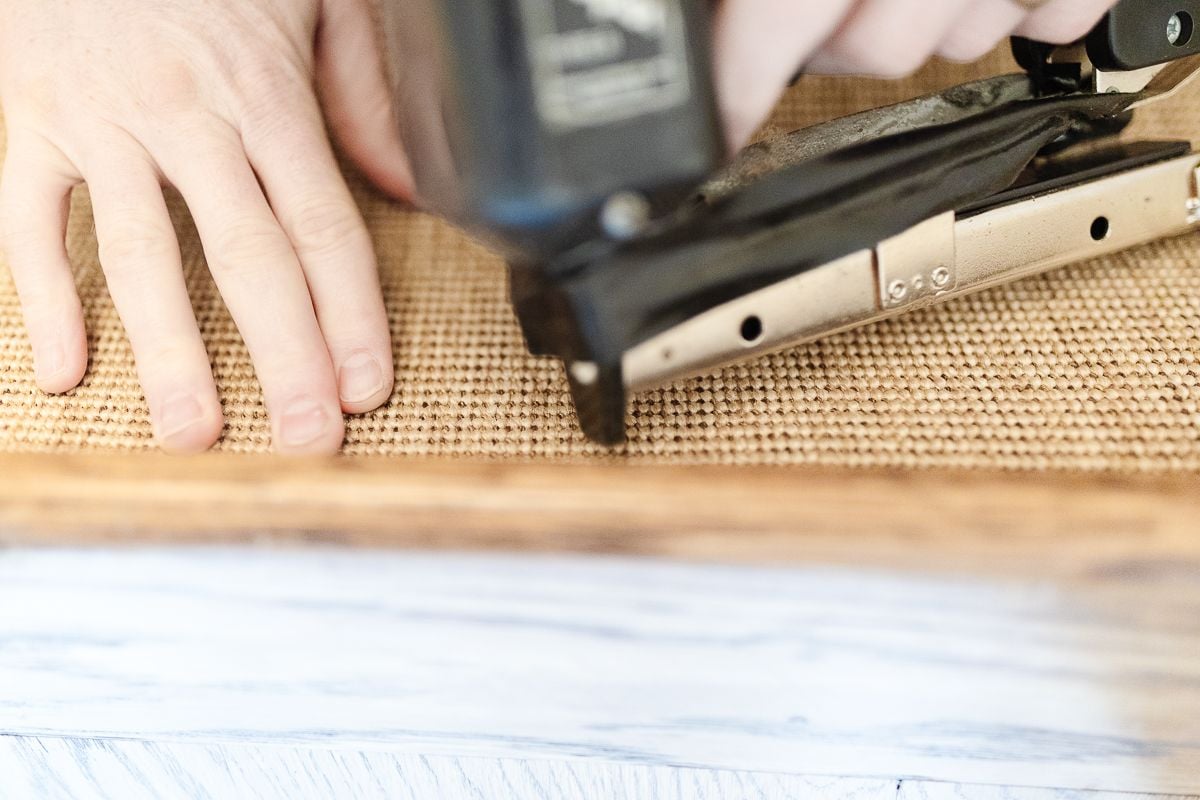
- Smooth the rug against the stair. Use nails to attach runner.
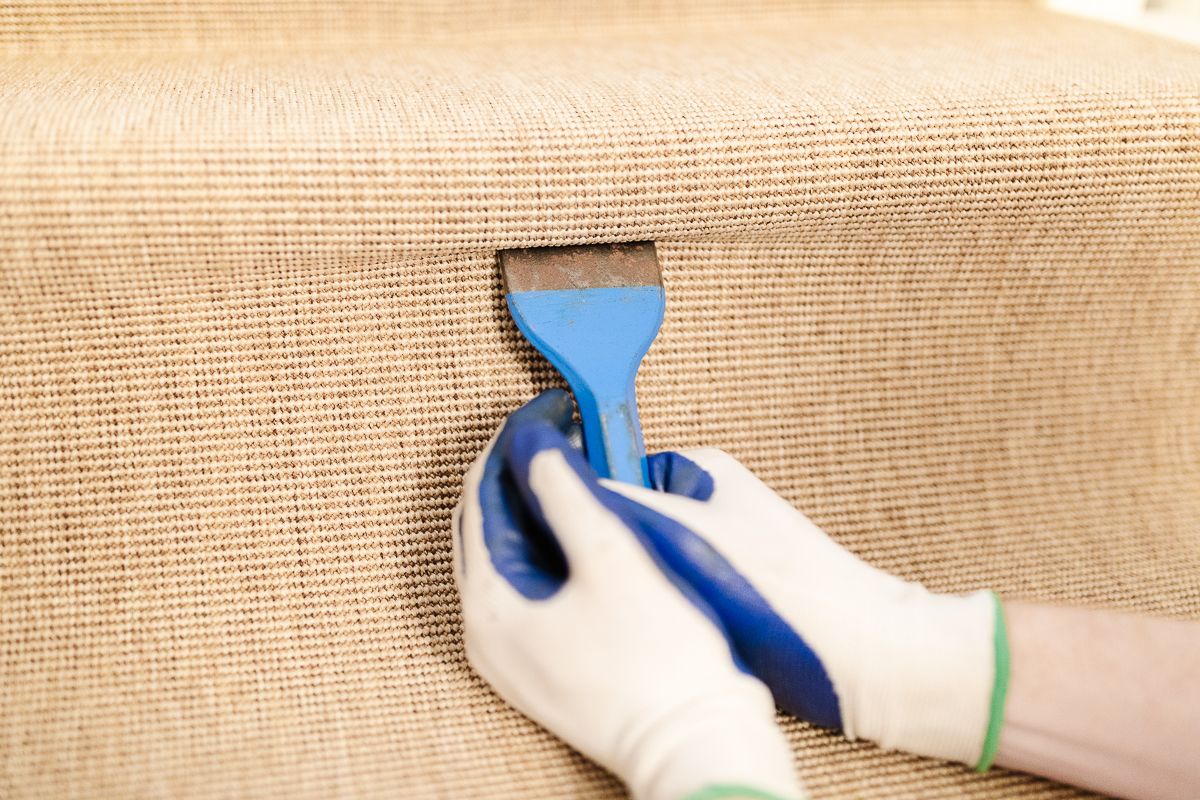
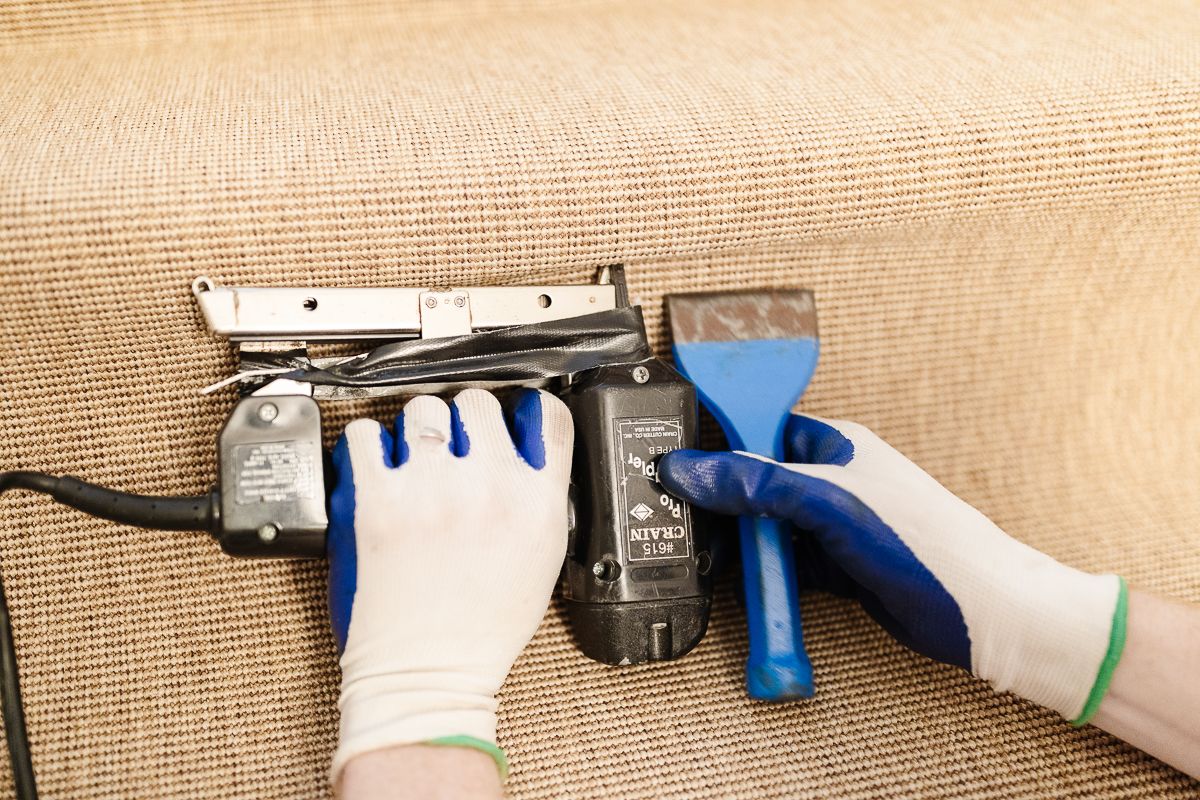
- Repeat the process until you reach the last tread you can cover. Tuck the unfinished end of the runner underneath to create a finished look, and attach with nails for a finished edge.

Tips
- It took 3 2’6″ x 8 runners to cover our stairs, but I was also able to use the remnant as a kitchen rug in our lake cottage!
- Be sure to add 6 inches to account for waste in this project!
- Don’t bother painting the center of your stairs that will be covered by the runner.
- In the entry stairs project that we just completed, we actually added a piece of quarter round to the base of the stairs to cover up the raw edge. Other times, we’ve used thinner runners that were able to be tucked and folded under before stapling/nailing at the bottom.
Frequently Asked Questions
No, it’s extremely simple if you purchase a ready made stair runner. It’s more challenging to use carpet not designed to be a runner and tuck the edges.
You can extend the life of a plush stair runner by using an underlay. They are not required, but add comfort when using an indoor outdoor rug or woven runner.
Stair runners are typically less expensive and labor intensive than running carpet across the entire width of the step.
Sources
The lightest one is our most recent project, as seen in the foyer design of our St. Louis home – it matches the custom sisal rug in our living room.

Entry Stair Runner
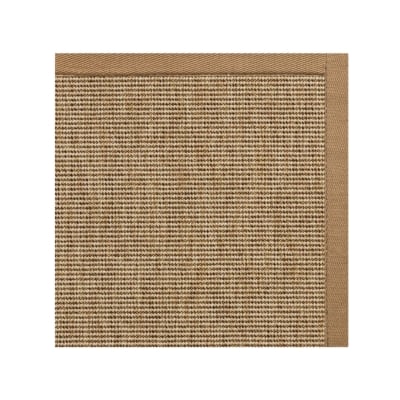
The Belize Outdoor Sisal Rug, in the color Frost, with an extra wide cotton Alabaster border.
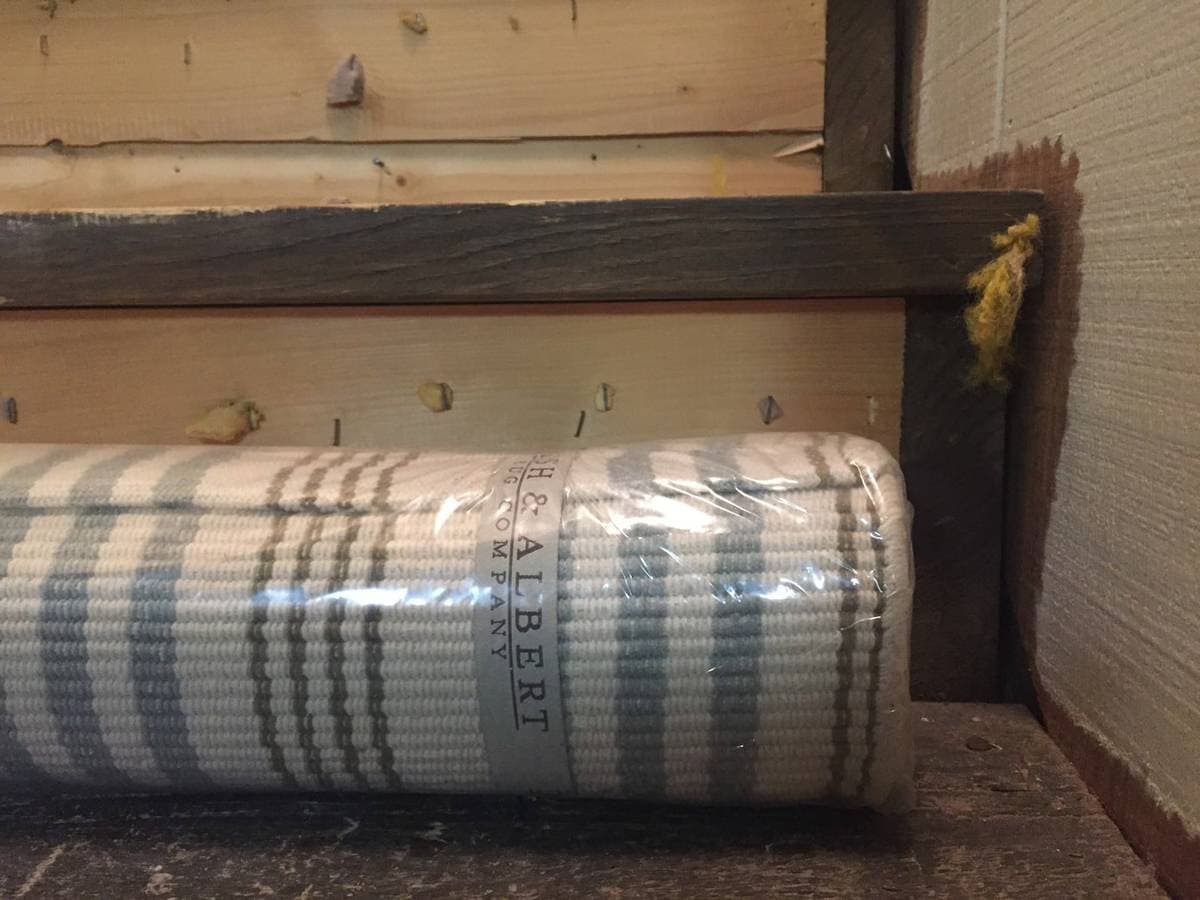
The darker one below is the current runner on our basement stairs, and the striped rug is our very first project!
Basement Stair Runner
The Belize Outdoor Sisal Rug, in the color Dune.
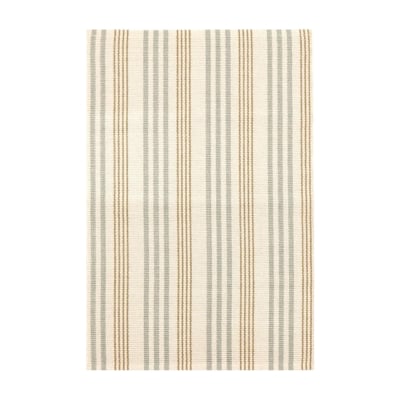
Striped Runner
Our original viral stair runner! This one is from Dash and Albert.
Amazon Storefront
Follow my Amazon Storefront to find more holiday looks for less.


Did you also link the runner for your staircase (not the basement one-I saw that). Thank you! Looks beautiful!
Hi Kristin,
They are the same runner, but in different colors. Basement was “Dune” and the upstairs is “Frost”. We’ve noted that in the source section but I think the link takes you to the same home page landing. You’ll see our two colors as options when you customize!
I hope that helps,
Julie
I’m having trouble finding the link to the solid cream colored stair runner… Can you please send that to me? Thank you so much.
Hi Diana,
We sent you an email!
Hope you have a wonderful day,
Julie
Hi! Love this thanks. Been looking to do this for years and this latest update/post us just the push I need.
When using a bit of padding…how do you determine size and how do you attach it? Just more staples? I want a bit more cushion as we play and sit on the stairs and I want cozy. ❤️.
Thank you! Great post and your work looks fabulous!
Hello,
Thanks for your comment! Regarding padding – yes, you staple it down. The size of the padding can vary. I prefer to leave an inch or more on both sides. Most pads are the length of the stair. I prefer not to have them overhang.
I hope that helps!
Julie
Love this, thanks for sharing!! Your Instagram post brought me here. Question – your Instagram reel shows you cutting the runner. Was that for the last step or did you cut each step? I didn’t really see that mentioned on your tutorial. How did you finish the runner at the end? Appreciate any advice!!
Hi Stephanie,
That was just for the last step. In the entry stairs project that we just completed, we actually added a piece of quarter round to the base of the stairs to cover up the raw edge. Other times, we’ve used thinner runners that we able to be tucked and folded under before stapling at the bottom.
I hope that helps!
Julie
So I’m trying to find the carpet runner link. Can you please provide from where you bought the runners?
Thanks.
Hi Tessa!
We updated the post to include all the sources- we’ve done this project three times so there are three links towards the end of the post!
I hope that helps!
Have a great week,
Julie